Your cart is currently empty!
DIY Reciprocating Cycle Linear Actuator 24V 120rpm Stroke 30-150mm Adjustable
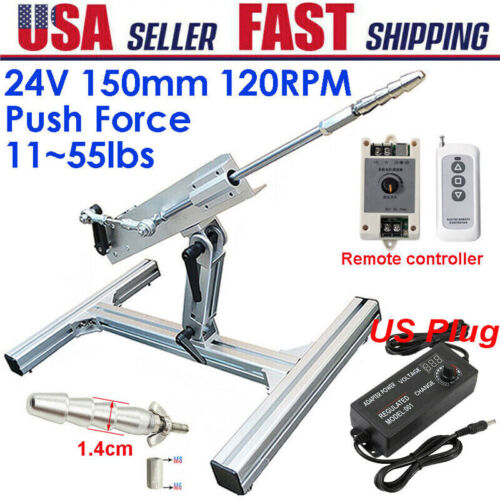

DIY Reciprocating Cycle Linear Actuator 24V 120rpm Stroke 30-150mm Adjustable
Price : 145.99
Ends on : N/A
View on eBay
Are you looking to create your own reciprocating cycle linear actuator for your next project? Look no further! In this post, we will guide you through the process of building a DIY Reciprocating Cycle Linear Actuator with a 24V motor, 120rpm speed, and adjustable stroke length of 30-150mm.
Materials needed:
– 24V DC motor with 120rpm speed
– Linear actuator rod
– Adjustable brackets
– Power supply
– Tools (screwdriver, wrench, drill)
Instructions:
1. Begin by attaching the linear actuator rod to the 24V DC motor. Make sure it is securely fastened to prevent any wobbling or misalignment.
2. Next, mount the motor onto a stable surface, such as a wooden board or metal frame, using adjustable brackets. This will ensure the motor stays in place during operation.
3. Connect the power supply to the motor and test the rotation to ensure it is functioning properly.
4. Adjust the stroke length of the linear actuator by moving the brackets along the rod. This will allow you to customize the movement range from 30-150mm.
5. Once you have set the desired stroke length, secure the brackets in place to prevent any movement during operation.
6. Test the reciprocating cycle linear actuator to ensure it is working smoothly and adjust as needed.
With this DIY project, you can create a customized reciprocating cycle linear actuator with adjustable stroke length to fit your specific needs. Whether you are building a robotic arm, automated door opener, or any other project requiring linear motion, this DIY actuator will help you achieve your goals. So gather your materials and get started on building your own reciprocating cycle linear actuator today!
#DIY #Reciprocating #Cycle #Linear #Actuator #24V #120rpm #Stroke #30150mm #Adjustable

Leave a Reply