As the title says, this was my first time mounting a monitor. Actually I have never mounted anything! I usually keep my monitors on their stand or TV's on a console.
I recently purchased a Dell S2721D to use as a dual monitor and larger screen for my Steam Deck. Unfortunately the base of the monitor stand was HUGE! It also only allowed the screen to tilt up or down, I needed more.
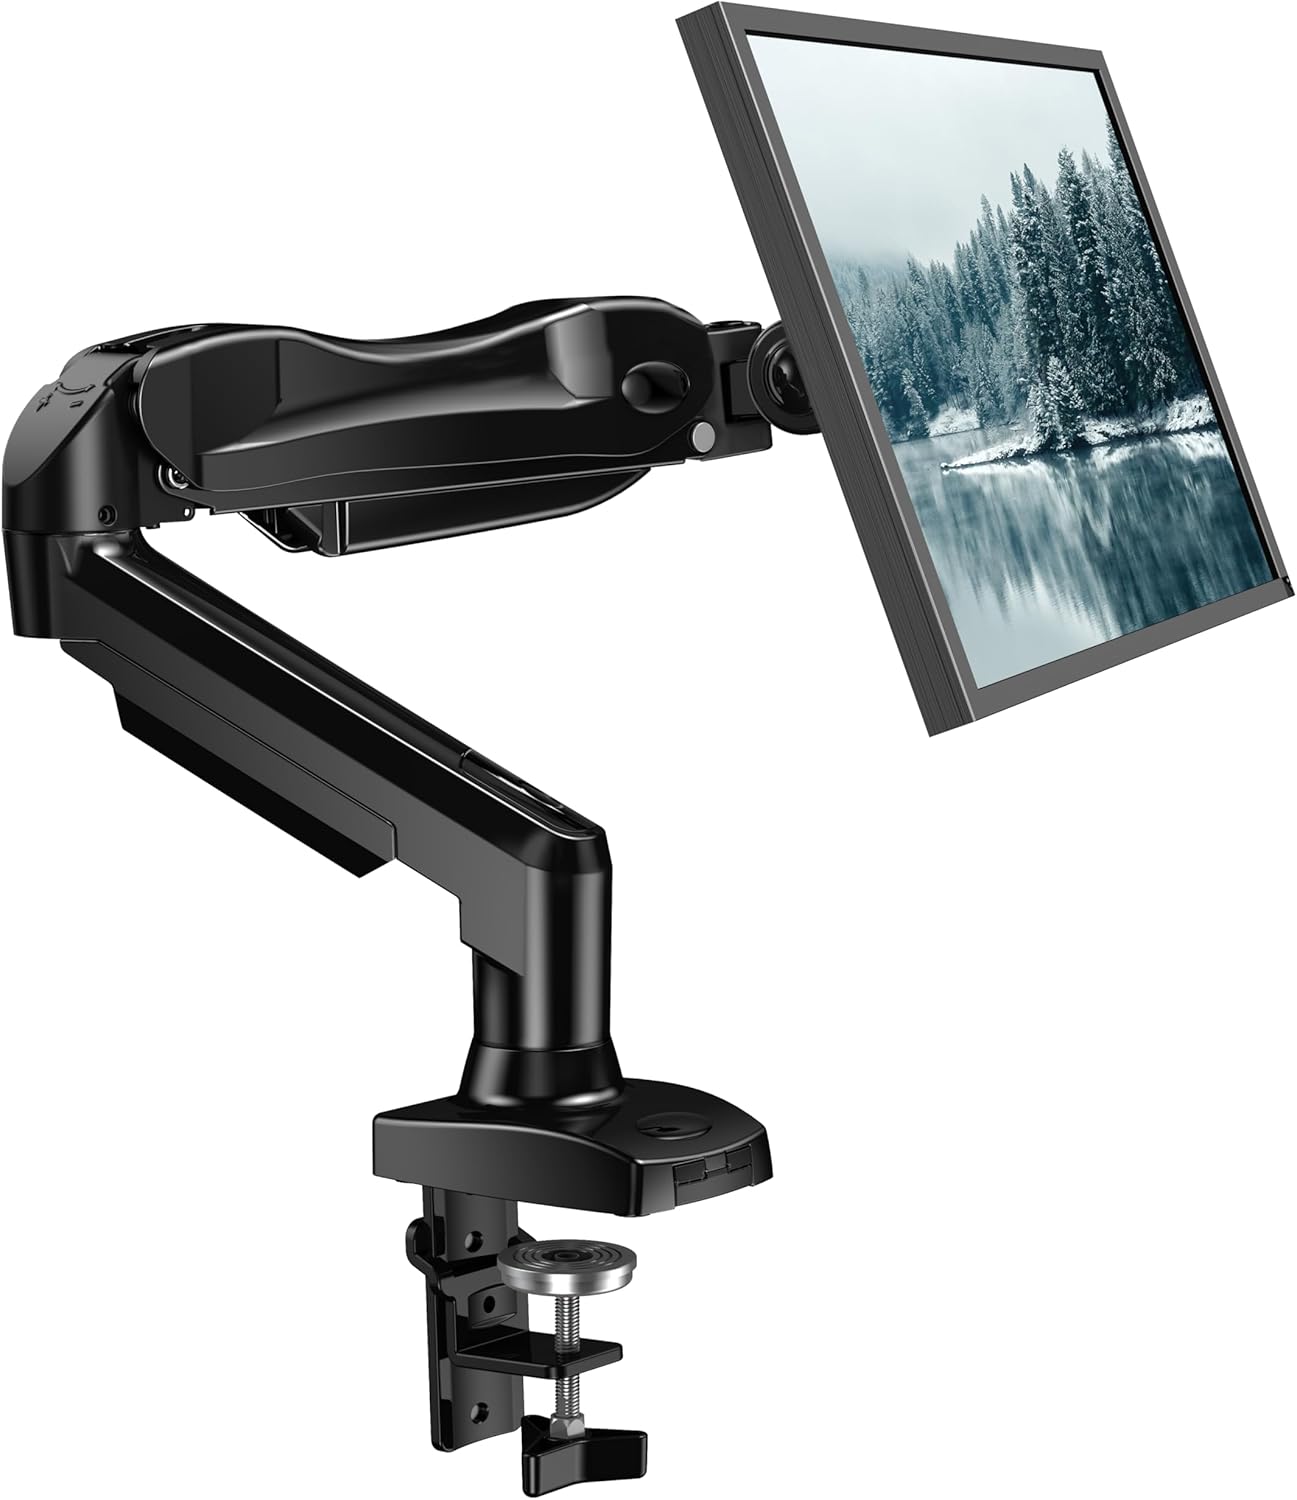
So a quick search on Amazon and I found this stand, what intrigued me was that it used gas for tension instead of coils. It also had a huge range of motion and tons of good reviews and was very affordable.
Come day of delivery I unboxed it, read the instructions and went to work. First piece of paper included separately from the instruction manual was directions on what to do if your desk has a metal frame and then wood boards on top of the frame. This was my case, I needed to take an extra step to make sure the base of the mount was secure to my desktop.
The instructions suggested using either a piece of wood to place under the desk next to the frame or a book, this way there is something there the same thickness of the wood + frame which would allow the gromet of the stand to catch onto something instead of just the lip of the metal frame.
I went with a thick book and it secured perfectly! Next step was to remove the plastic frame from the lower arm and the upper arm so I could feed my wires through. This is where I hit a slight snag, the screw for the bottom arm was in an awkward area, the provided Allan key/Phillips head combo was too small to get a good fit into the screw head and only took a couple of twists to realize it could strip the screw head. Luckily I had a different screw driver and with a little effort I was able to get the screw out and the piece open.
I placed my two HDMI wires and the power wire through the top cover first, made sure there was enough slack at the top and then screwed the plate back onto the top arm making sure it was not too tight. Then I pulled the cables down through the bottom plastic plate and screwed it back onto the bottom arm. Once I knew I had enough slack I tightened both covers.
Next up was actually mounting the monitor. I removed the 4 screws that were already in the monitor and replaced them with the screws provided with the stand as they had larger heads. I screwed in the top two just enough to keep them secure and then hung the monitor onto the top of the plate which was secured to the arm, think hanging a picture frame. Now that the monitor was hanging on the plate, I slowly let go of the monitor as to avoid having the arm slam down or dropping the monitor which is a little less than 10 pounds. It hung with no issue, the arm didn't even go down in the slightest ( there's that gas power! ).
I then secured the bottom two screws to the plate and tightened the top two screws, we were fully secured! I plugged in the power, the two HDMI cords and then rotated the screen 90 degrees to make it vertical and make sure I had enough slack for the monitor to rotate that far without causing pressure on the cords. Once that was done I pulled more of the cords down through the arms.
Last step was to reduce the tension of the arm so that the arm could move up and down without too much force. I reduced it just enough to allow full movement yet keep the monitor in its place once released.
Now I have full motion of the monitor, I can move it almost anywhere I need to to have the best view possible. This stand is solid, functional and the best bang for your buck!


Leave a Reply