Fix today. Protect forever.
Secure your devices with the #1 malware removal and protection software
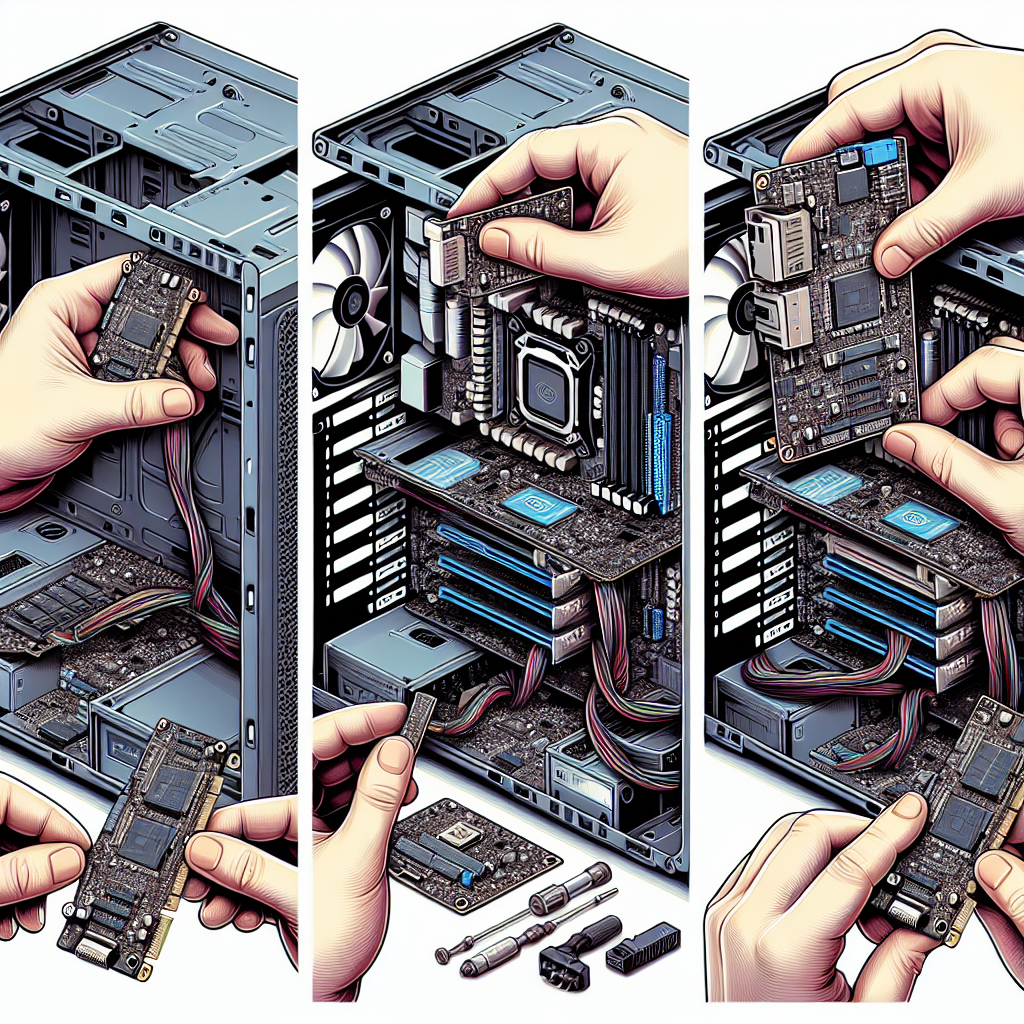
If you’re looking to upgrade your PC’s storage capacity and speed, installing an SXM2 to PCIe adapter is a great option. This adapter allows you to add an additional M.2 solid-state drive (SSD) to your system, providing faster data transfer speeds and more storage space. In this step-by-step guide, we’ll walk you through the process of installing an SXM2 to PCIe adapter in your PC.
Step 1: Gather Your Materials
Before you begin the installation process, make sure you have all the necessary materials on hand. You’ll need:
– An SXM2 to PCIe adapter
– An M.2 SSD
– A screwdriver
– Your PC’s user manual (for reference)
Step 2: Prepare Your PC
Before you start working on your PC, shut it down and unplug it from the power source. This will ensure your safety while working on the internal components.
Step 3: Open Your PC Case
Use a screwdriver to remove the screws holding your PC case together. Carefully slide off the side panel to access the internal components.
Step 4: Locate the PCIe Slot
Locate an available PCIe slot on your motherboard where you can install the SXM2 to PCIe adapter. Most motherboards have multiple PCIe slots, so choose one that is not already in use.
Step 5: Install the SXM2 to PCIe Adapter
Carefully insert the SXM2 to PCIe adapter into the chosen PCIe slot on your motherboard. Make sure it is securely in place before moving on to the next step.
Step 6: Install the M.2 SSD
Next, insert the M.2 SSD into the adapter. The M.2 SSD should slide into the slot on the adapter easily. Secure it in place with the provided screw.
Step 7: Close Your PC Case
Once the SXM2 to PCIe adapter and M.2 SSD are securely installed, replace the side panel of your PC case and fasten the screws to secure it in place.
Step 8: Power On Your PC
Plug your PC back into the power source and power it on. Your system should recognize the new M.2 SSD and prompt you to set it up.
Step 9: Initialize the M.2 SSD
Follow the on-screen instructions to initialize and format the new M.2 SSD. Once this process is complete, your new storage drive should be ready to use.
Congratulations! You have successfully installed an SXM2 to PCIe adapter and expanded your PC’s storage capacity and speed. Enjoy the benefits of faster data transfer speeds and more storage space with your new M.2 SSD.
Fix today. Protect forever.
Secure your devices with the #1 malware removal and protection software
#StepbyStep #Guide #Installing #SXM2 #PCIe #Adapter,sxm2 to pcie adapter
Leave a Reply
You must be logged in to post a comment.