Your cart is currently empty!
Tag: Installing
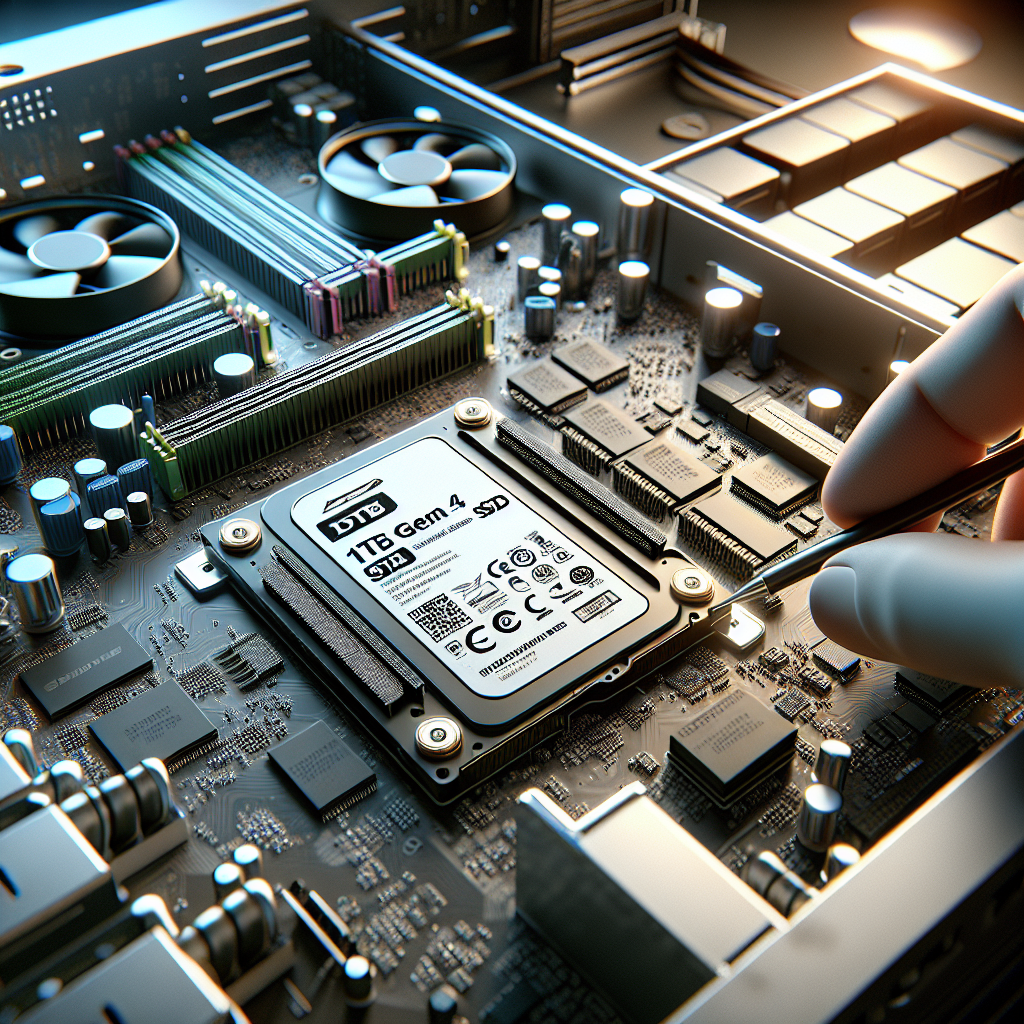
A Comprehensive Guide to Installing and Using a 1TB PCIe Gen4 SSD
A Comprehensive Guide to Installing and Using a 1TB PCIe Gen4 SSDSolid State Drives (SSDs) have become increasingly popular in recent years due to their faster speeds and increased reliability compared to traditional Hard Disk Drives (HDDs). One of the latest advancements in SSD technology is the PCIe Gen4 interface, which offers even faster speeds and improved performance.
If you’re looking to upgrade your computer’s storage with a 1TB PCIe Gen4 SSD, you’ve come to the right place. In this comprehensive guide, we’ll walk you through the steps of installing and using a 1TB PCIe Gen4 SSD.
Step 1: Check Compatibility
Before purchasing a 1TB PCIe Gen4 SSD, it’s important to check if your computer’s motherboard supports the PCIe Gen4 interface. Most modern motherboards released after 2019 are compatible with PCIe Gen4 SSDs, but it’s always a good idea to double-check to avoid any compatibility issues.
Step 2: Gather the Necessary Tools
To install a 1TB PCIe Gen4 SSD, you’ll need the following tools:
– 1TB PCIe Gen4 SSD
– Screwdriver
– Anti-static wrist strap (optional but recommended)
– User manual for your computer or motherboard
Step 3: Install the 1TB PCIe Gen4 SSD
1. Power off your computer and disconnect all cables.
2. Open your computer case by removing the side panel.
3. Locate an available M.2 slot on your motherboard.
4. Insert the 1TB PCIe Gen4 SSD into the M.2 slot at a 30-degree angle.
5. Secure the SSD in place with the screw provided.
6. Close your computer case and reconnect all cables.
Step 4: Initialize and Format the SSD
Once the 1TB PCIe Gen4 SSD is installed, you’ll need to initialize and format it before you can start using it. Here’s how to do it:
1. Power on your computer and press the appropriate key to enter the BIOS settings.
2. Locate the new SSD in the BIOS and select it as the boot device.
3. Save changes and exit the BIOS.
4. Once your computer boots up, go to Disk Management (Windows) or Disk Utility (Mac).
5. Initialize the SSD and create a new partition.
6. Format the SSD with the desired file system (e.g., NTFS for Windows, APFS for Mac).
Step 5: Transfer Data and Enjoy Faster Speeds
Now that your 1TB PCIe Gen4 SSD is installed and formatted, you can start transferring your data to enjoy faster speeds and improved performance. Simply drag and drop your files onto the SSD or use a cloning software to transfer your operating system and applications.
In conclusion, installing and using a 1TB PCIe Gen4 SSD is a straightforward process that can greatly enhance your computer’s storage and performance. By following this comprehensive guide, you’ll be able to upgrade your storage with ease and enjoy the benefits of faster speeds and improved reliability.
#Comprehensive #Guide #Installing #1TB #PCIe #Gen4 #SSD,1tb pcie gen4 ssd
The Ultimate Guide to Choosing and Installing a 2TB NVMe SSD
If you’re looking to upgrade your computer’s storage capacity and speed, a 2TB NVMe SSD is a great option. NVMe (Non-Volatile Memory Express) SSDs are the latest in solid-state drive technology, offering faster read and write speeds than traditional SATA SSDs. In this guide, we’ll go over everything you need to know about choosing and installing a 2TB NVMe SSD.Choosing the Right 2TB NVMe SSD
When choosing a 2TB NVMe SSD, there are a few key factors to consider:
1. Read and Write Speeds: NVMe SSDs are known for their fast read and write speeds, so be sure to look for a drive that offers high performance in both areas.
2. Endurance: SSD endurance is measured in terabytes written (TBW), which indicates how much data can be written to the drive before it starts to degrade. Look for a drive with a high TBW rating to ensure longevity.
3. Price: NVMe SSDs are generally more expensive than SATA SSDs, so be sure to compare prices and find a drive that fits your budget.
4. Brand: Stick to reputable brands like Samsung, Western Digital, and Crucial to ensure quality and reliability.
Installing a 2TB NVMe SSD
Once you’ve chosen the right 2TB NVMe SSD for your needs, it’s time to install it in your computer. Here’s a step-by-step guide to help you through the process:
1. Turn off your computer and unplug it from the power source.
2. Open your computer case and locate the M.2 slot on your motherboard. This is where the NVMe SSD will be installed.
3. Insert the NVMe SSD into the M.2 slot at a 30-degree angle, then gently press down until it is fully seated.
4. Secure the NVMe SSD with the screw provided, if necessary.
5. Close your computer case and plug it back in.
6. Turn on your computer and go into the BIOS to ensure that the NVMe SSD is recognized. You may need to enable the drive in the BIOS settings.
7. Once the NVMe SSD is recognized, you can format it and start using it as additional storage or as your primary drive.
With the right 2TB NVMe SSD and a little know-how, you can significantly improve your computer’s storage capacity and speed. Follow this guide to choose and install a 2TB NVMe SSD, and enjoy faster performance and increased storage space for all your files and programs.
#Ultimate #Guide #Choosing #Installing #2TB #NVMe #SSD,2tb nvme ssd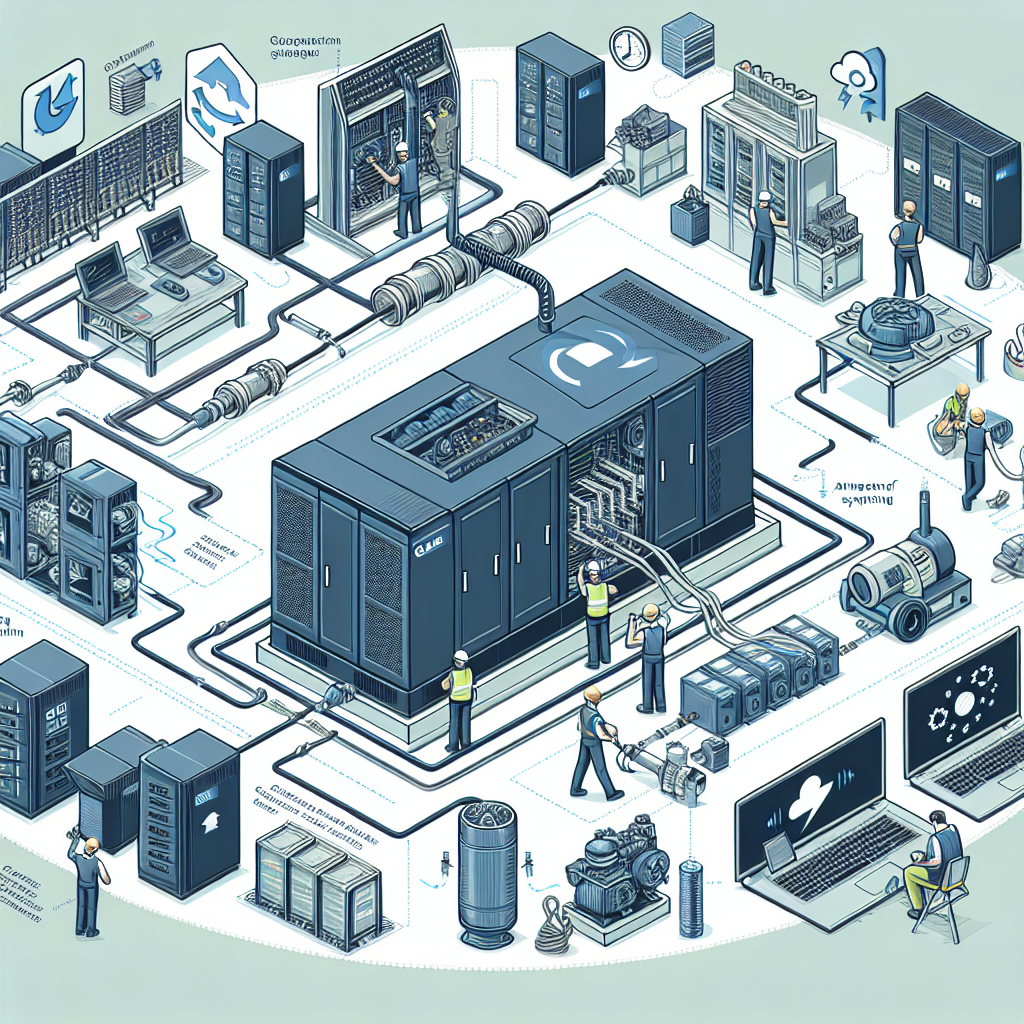
Tips for Properly Sizing and Installing a Data Center Generator
Data centers are critical infrastructure for many businesses, providing the necessary power and cooling to keep servers and networking equipment running smoothly. One key component of a data center is the backup generator, which is essential for ensuring uninterrupted power in the event of a utility outage. Properly sizing and installing a data center generator is crucial for ensuring that it can provide the necessary power during an emergency.Here are some tips for properly sizing and installing a data center generator:
1. Determine your power needs: The first step in sizing a data center generator is to determine your power requirements. This includes calculating the total power consumption of all the equipment in the data center, as well as any future expansion plans. It’s important to consider both the peak power demand and the average power consumption to ensure that the generator can handle the load.
2. Choose the right fuel type: Data center generators typically run on diesel, natural gas, or propane. Each fuel type has its own pros and cons, so it’s important to choose the one that best fits your needs. Diesel generators are more efficient and have a longer lifespan, but they require more maintenance. Natural gas generators are cleaner and more environmentally friendly, but they may not be as reliable in a disaster scenario.
3. Consider redundancy: To ensure maximum uptime, it’s a good idea to install redundant generators in the data center. This means having multiple generators that can each handle the full load of the data center in case one fails. Redundancy is key for ensuring uninterrupted power during emergencies.
4. Hire a professional installer: Installing a data center generator is a complex and potentially dangerous task that should only be done by trained professionals. Make sure to hire a reputable company with experience in installing data center generators to ensure that the installation is done safely and correctly.
5. Test the generator regularly: Once the generator is installed, it’s important to test it regularly to ensure that it will work when needed. This includes running load tests to simulate an outage and checking for any issues that may arise. Regular maintenance and testing are essential for ensuring that the generator is ready to provide backup power when necessary.
Properly sizing and installing a data center generator is essential for ensuring that your data center can continue to operate smoothly in the event of a power outage. By following these tips, you can ensure that your generator is up to the task of providing backup power when needed.

The Benefits of Installing an Air Conditioning System in Your Home
When the temperatures rise during the hot summer months, having an air conditioning system in your home can make all the difference in staying cool and comfortable. Not only does air conditioning provide relief from the sweltering heat, but it also offers a range of other benefits that can enhance your overall quality of life.One of the main benefits of installing an air conditioning system in your home is improved indoor air quality. Air conditioning units are equipped with filters that help to remove dust, pollen, and other allergens from the air, creating a cleaner and healthier environment for you and your family. This can be especially beneficial for individuals with respiratory issues or allergies.
Another advantage of having an air conditioning system is the ability to control the temperature and humidity levels in your home. By setting the thermostat to your desired comfort level, you can create a more pleasant living space that is conducive to relaxation and productivity. This can also help to prevent heat-related illnesses and improve overall well-being.
In addition, air conditioning can improve sleep quality by providing a cool and comfortable environment for rest. Research has shown that sleeping in cooler temperatures can lead to better sleep patterns and overall health. By maintaining a consistent temperature in your bedroom, you can create an ideal sleeping environment that promotes restful and rejuvenating sleep.
Furthermore, installing an air conditioning system can increase the value of your home. Potential buyers are often willing to pay more for a property that is equipped with modern amenities, including air conditioning. This can make your home more attractive to buyers and potentially lead to a quicker sale when the time comes to move.
Overall, the benefits of installing an air conditioning system in your home are numerous and can greatly enhance your comfort and quality of life. From improved indoor air quality to better sleep and increased home value, air conditioning is a wise investment that can provide long-lasting benefits for you and your family. So, if you haven’t already, consider installing an air conditioning system in your home to enjoy all of these advantages and more.
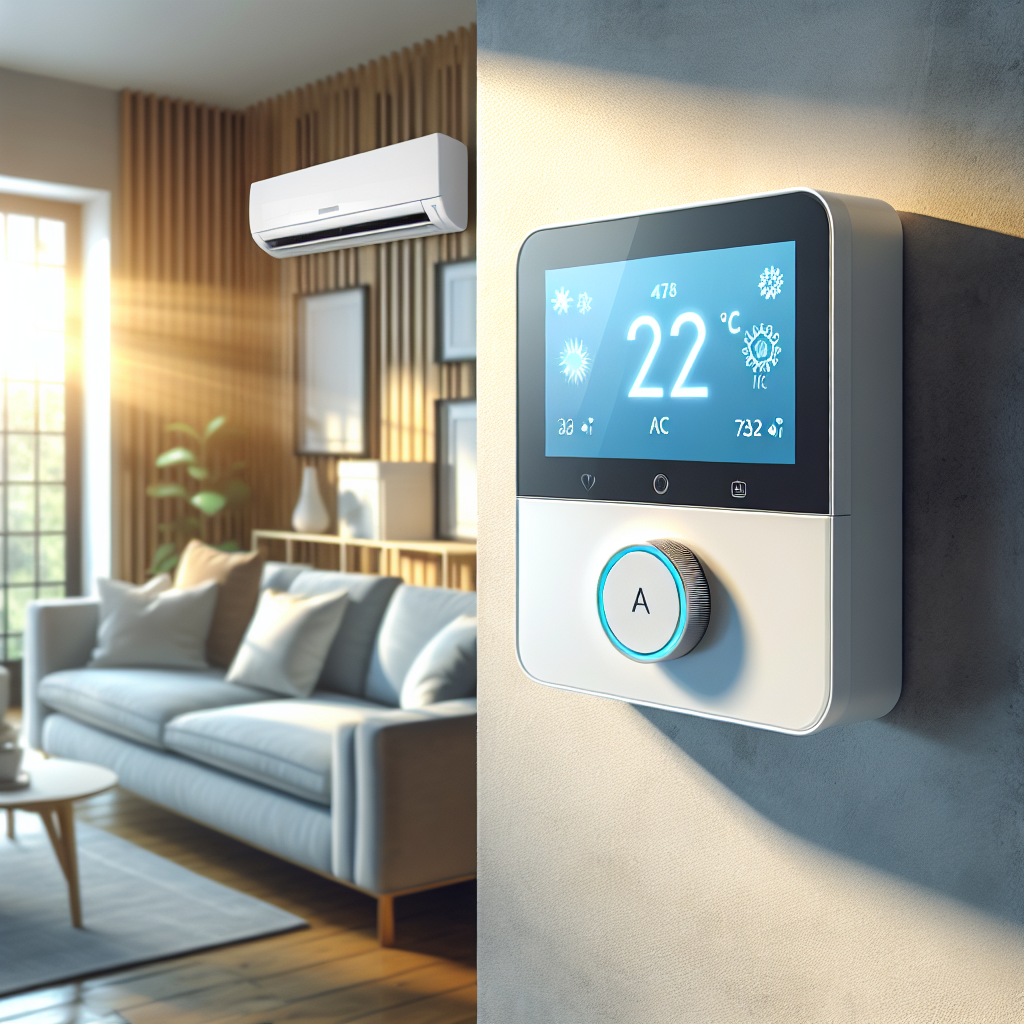
The Benefits of Installing a Smart Thermostat with Your Air Conditioning
As technology continues to advance, so do the options available for making our homes more comfortable and energy-efficient. One such innovation is the smart thermostat, which offers numerous benefits when installed with your air conditioning system.One of the primary advantages of a smart thermostat is its ability to learn your habits and preferences over time. By analyzing your usage patterns, the thermostat can automatically adjust the temperature to ensure optimal comfort and energy savings. This can result in lower utility bills, as the system will not be running unnecessarily when you are not home or when the temperature does not need to be as low.
Another benefit of a smart thermostat is the ability to control it remotely from your smartphone or other devices. This means you can adjust the temperature of your home from anywhere, whether you are at work, on vacation, or simply lounging on the couch. This can be especially helpful if you forget to adjust the temperature before leaving the house, as you can easily do so from your phone.
In addition, many smart thermostats offer features such as energy usage tracking and scheduling, which can help you better understand and manage your energy consumption. Some models even provide recommendations for saving energy, such as setting a more efficient temperature schedule or alerting you when it’s time to change your air filters.
Furthermore, smart thermostats are often compatible with other smart home devices, such as voice assistants and smart speakers. This allows for seamless integration and control of all your connected devices from one central hub.
Overall, installing a smart thermostat with your air conditioning system can provide numerous benefits, including increased comfort, energy savings, and convenience. With the ability to learn your habits, control remotely, and integrate with other smart devices, a smart thermostat is a worthwhile investment for any homeowner looking to improve their home’s efficiency and comfort.

The Ultimate Guide to Choosing and Installing 16GB DDR5 RAM
If you’re looking to upgrade your computer’s memory, choosing and installing 16GB DDR5 RAM is a great way to boost performance and speed up your system. With the latest DDR5 technology, you can enjoy faster data transfer speeds and improved multitasking capabilities. In this ultimate guide, we will walk you through the process of choosing the right RAM for your needs and installing it properly in your computer.Choosing the Right RAM
When it comes to choosing RAM for your computer, there are a few key factors to consider. The first thing you’ll want to look at is the type of RAM your motherboard supports. In this case, we’re focusing on DDR5 RAM, which is the latest generation of DDR memory. Make sure your motherboard is compatible with DDR5 RAM before making a purchase.
Next, you’ll want to consider the speed of the RAM. DDR5 RAM offers faster data transfer speeds compared to previous generations, so you can expect improved performance when using 16GB DDR5 RAM. Look for RAM with higher clock speeds for the best performance.
Another important factor to consider is the capacity of the RAM. 16GB is a good amount of memory for most users, allowing for smooth multitasking and running demanding applications without any lag. If you’re a power user or gamer, you may want to consider upgrading to 32GB or more for even better performance.
Installing the RAM
Once you’ve chosen the right 16GB DDR5 RAM for your computer, it’s time to install it. Here’s a step-by-step guide to help you through the process:
1. Turn off your computer and unplug all cables.
2. Open up your computer case and locate the RAM slots on your motherboard. Most motherboards have multiple slots for RAM, so make sure to choose an empty slot for your new RAM.
3. Press down on the tabs on either side of the RAM slot to release the existing RAM stick. Carefully remove it from the slot.
4. Take your new 16GB DDR5 RAM stick and align it with the slot, making sure the notch on the stick lines up with the notch on the slot.
5. Gently push down on the RAM stick until it clicks into place. Make sure it is securely seated in the slot.
6. Close up your computer case and plug in all cables.
7. Turn on your computer and check the system information to ensure that the new RAM is recognized and functioning properly.
By following these steps, you can easily upgrade your computer with 16GB DDR5 RAM and enjoy faster performance and improved multitasking capabilities. Remember to choose the right RAM for your needs and install it properly to get the most out of your upgrade.

Everything You Need to Know About Installing and Using a 2TB NVMe SSD
As technology continues to advance, so do our storage needs. With the increasing demand for larger storage capacities and faster data transfer speeds, NVMe SSDs have become a popular choice for many users. If you’re considering upgrading to a 2TB NVMe SSD, here’s everything you need to know about installing and using one.What is an NVMe SSD?
NVMe (Non-Volatile Memory Express) SSDs are a type of solid-state drive that connects to your computer’s motherboard using the PCIe interface. This allows for faster data transfer speeds compared to traditional SATA SSDs, making NVMe SSDs an ideal choice for those who need high-performance storage solutions.
Why choose a 2TB NVMe SSD?
A 2TB NVMe SSD offers a large storage capacity, allowing you to store more files, applications, and games without compromising on speed. With read and write speeds that are significantly faster than traditional hard drives, a 2TB NVMe SSD can help improve your computer’s overall performance and reduce loading times for your applications.
How to install a 2TB NVMe SSD:
1. Check compatibility: Before purchasing a 2TB NVMe SSD, make sure that your motherboard supports NVMe drives and has an available M.2 slot for installation.
2. Prepare your computer: Shut down your computer and disconnect all cables. Open the case and locate the M.2 slot on your motherboard.
3. Install the NVMe SSD: Insert the NVMe SSD into the M.2 slot at a 30-degree angle and gently push it down until it is securely in place. Secure the SSD with the screw provided.
4. Boot up your computer: Close the case, reconnect all cables, and boot up your computer. Your 2TB NVMe SSD should now be recognized by your system.
How to use a 2TB NVMe SSD:
1. Transfer files: Once your NVMe SSD is installed, you can start transferring files from your old drive to your new drive. Simply drag and drop your files or use cloning software for a seamless transition.
2. Install applications: Install your favorite applications and games on your new NVMe SSD to take advantage of its fast data transfer speeds. This will help improve loading times and overall performance.
3. Enjoy faster performance: With a 2TB NVMe SSD, you can enjoy faster boot times, quicker application launches, and smoother gameplay. Say goodbye to slow loading screens and hello to a more responsive computing experience.
In conclusion, installing and using a 2TB NVMe SSD can greatly enhance your computer’s performance and storage capabilities. By following the steps outlined above, you can easily upgrade your system and enjoy the benefits of faster data transfer speeds and larger storage capacities. Consider investing in a 2TB NVMe SSD today to take your computing experience to the next level.

Tool Pouch Bag Tool Backpack Oxford Fabric Accessory Storage Case for Electric Grinder Drill Convenient for Electricians during Installing or Maintenance(Long style)
Price: $27.99
(as of Dec 21,2024 01:49:02 UTC – Details)
From the brand


Welcome to TOTITOM
Hello there,
Swipe for more Categories
Party props
Christmas decorations
Statues for home decor
Cooker Pot
switch stand
Coffee pot
Handling tools
Pet Supplies
Bathroom Supplies
Measurement Tools
Tent
Kitchen Supplies
Lunch Box
Water Cup

TOTITOM is a lifeful brand that provides decorations choice to express your personality and extension of yourself to your home.
Our team is consist of professional members with enthusiasm for devoting premium home decoration products.
Our target is to provide the best home decor options that will help you feel content and achieve the best ambiance in your home place.
Suitable Situation: tool pouches zipper Suitable for storage electric tools like electric grinder and electric drill, for easy carrying and simple storage. it is suitable for storing tools at home. It’s can also be placed directly in the suitcase for traveling, Keep all set well organized and tidy, and saves more room.
Protective: tool pouch organiser Stylish and durable, prevents any damages or scratches caused by accidentally bumping or dropping, keeps the device in good conditions.
Convenient Design: tool pouch bag Designed with handle, easy to carry and move, lining with mesh design, can be convenient to distinguish the storage of items. There’s also a zippered pocket inside for smaller accessories, large enough for daily use. This small tool case is designed with Sturdy Ergonomic Handle, for carrying it by hand more comfortably.
Strong Material: tool pouch Made of oxford cloth composite EVA material, tear resistant, durable, can play a good protective role for inner tools.
Optional Size: 2 types are available: The outer size of short type is about 27x22x7cm/10.6x 8.7x 2.8in, inner space size is about 25x21x4cm/9.8×8.3x 1.6in; The long type outer size is about 32x22x7cm/12.6x 8.7×2.8in, inner size is about 31x21x5cm/12.2×8.
Are you an electrician looking for a convenient and reliable tool storage solution? Look no further than the Tool Pouch Bag Tool Backpack Oxford Fabric Accessory Storage Case! This long style tool pouch is perfect for carrying all your essentials, such as electric grinder and drill, during installation or maintenance jobs.Made from durable Oxford fabric, this tool pouch is built to last and withstand the wear and tear of daily use. The multiple pockets and compartments allow for easy organization of your tools, making it quick and easy to find what you need when you need it.
Whether you’re climbing up a ladder or working in tight spaces, this tool pouch is designed for comfort and convenience. The adjustable straps and padded back ensure a comfortable fit, while the sturdy construction keeps your tools secure and accessible.
Don’t let a disorganized tool bag slow you down on the job. Invest in the Tool Pouch Bag Tool Backpack Oxford Fabric Accessory Storage Case and stay efficient and productive during every installation or maintenance project. Get yours today and experience the convenience and reliability of this must-have tool storage solution!
#Tool #Pouch #Bag #Tool #Backpack #Oxford #Fabric #Accessory #Storage #Case #Electric #Grinder #Drill #Convenient #Electricians #Installing #MaintenanceLong #style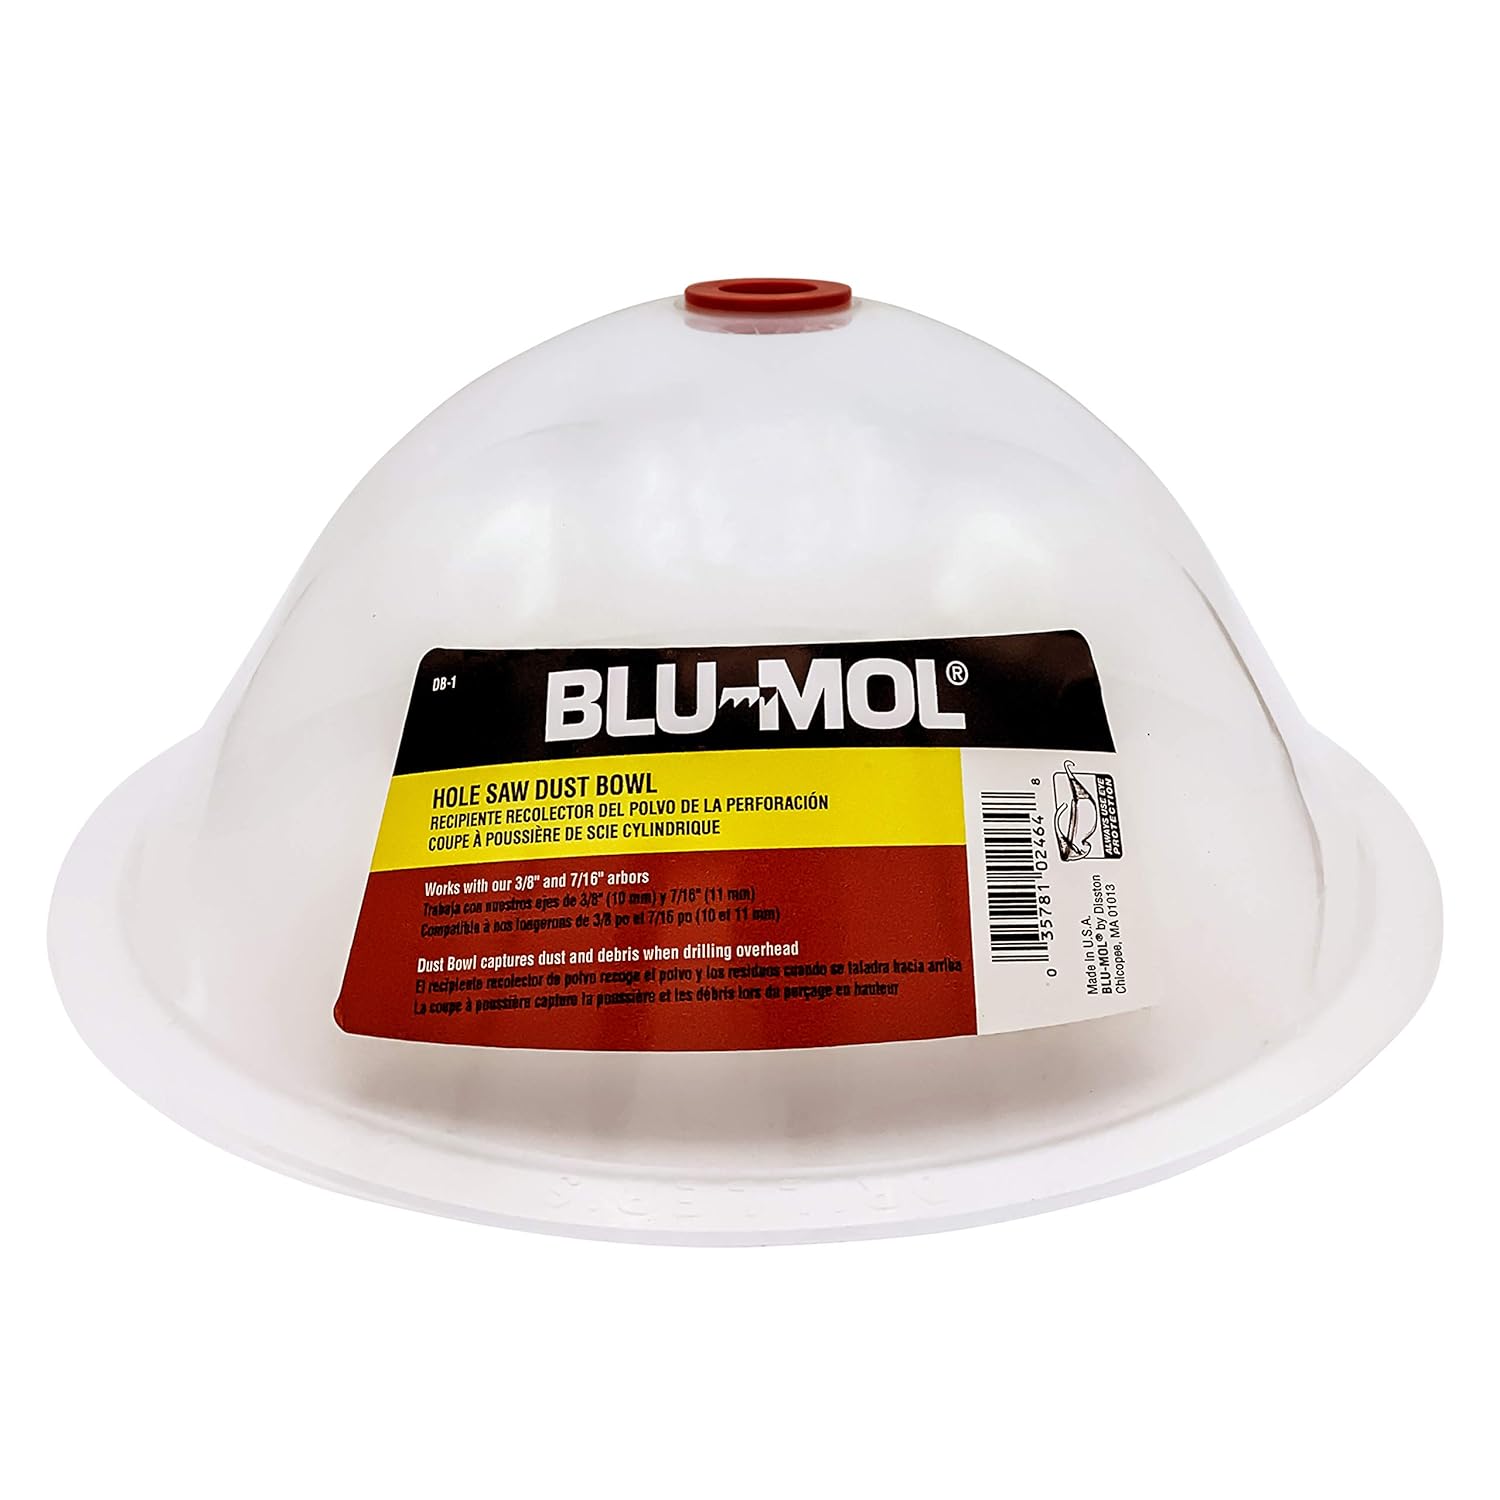
Disston E0215000 Blu-Mol RemGrit Collapsible Hole Saw Accessories Dust Bowl, for Installing Recessed Lights and Works With All Hole Saws
Price: $13.86
(as of Dec 21,2024 00:11:20 UTC – Details)
Less Mess: Keep your work space clean and free of dust with Disston’s Blu-Mol dust bowl
Universal: Conveniently compatible with any hole saw, and durable enough for many projects to come
Built to Last: Flexible silicone featuring high heat and abrasion resistance, this dust bowl resists snagging, allows for smooth cutting and general wear resistance
Cuts Through: Cut extremely hard materials, from laminates, fiberglass, ceramic tile, marble, and sheetrock; Ideal for installing recessed lighting, and construction projects
Quick Clean Up: Simply wash the dust bowl after each useCustomers say
Customers appreciate the dust retention, value for money, and mess control of the saw blade. They find it works well, is easy to use, and has good drill accuracy. However, opinions differ on its durability.
AI-generated from the text of customer reviews
If you’re in the market for a reliable and convenient dust collection solution for your hole sawing projects, look no further than the Disston E0215000 Blu-Mol RemGrit Collapsible Hole Saw Accessories Dust Bowl. This innovative accessory is perfect for installing recessed lights and works seamlessly with all hole saws.The collapsible design of the Dust Bowl makes it easy to attach to your hole saw and collect dust and debris as you work, keeping your work area clean and reducing the risk of inhalation of harmful particles. This not only makes for a cleaner and safer work environment but also saves you time and effort on clean-up.
Whether you’re a professional contractor or a DIY enthusiast, the Disston E0215000 Blu-Mol RemGrit Collapsible Hole Saw Accessories Dust Bowl is a must-have tool for your hole sawing projects. Don’t let dust and debris slow you down – invest in this handy accessory and make your work easier and more efficient.
#Disston #E0215000 #BluMol #RemGrit #Collapsible #Hole #Accessories #Dust #Bowl #Installing #Recessed #Lights #Works #Hole #Saws
The Benefits of Installing a Smart Thermostat in Your Home
Smart thermostats are becoming increasingly popular in homes across the country, and for good reason. These devices offer a wide range of benefits that can make a significant impact on both your comfort and your energy bills. If you’re considering upgrading to a smart thermostat, here are some of the key benefits you can expect to enjoy.1. Energy savings: One of the biggest advantages of a smart thermostat is its ability to help you save energy and reduce your utility bills. These devices are designed to learn your heating and cooling preferences and adjust the temperature accordingly. They can also be controlled remotely from your smartphone, so you can easily make adjustments when you’re away from home. By optimizing your HVAC system’s performance, a smart thermostat can help you save money on your energy bills each month.
2. Increased comfort: Smart thermostats offer more precise temperature control than traditional thermostats, which can help you maintain a more comfortable home environment. Many smart thermostats also come with features like zoning capabilities, which allow you to set different temperatures for different areas of your home. This can help eliminate hot and cold spots and ensure that every room in your home is at the perfect temperature.
3. Convenience: With a smart thermostat, you can easily control your home’s temperature from anywhere using your smartphone or tablet. This means you can adjust the temperature before you get home from work, while you’re on vacation, or even while you’re lying in bed. Some smart thermostats also have features like geofencing, which can automatically adjust the temperature based on your location. This level of convenience can make it easier to manage your home’s energy usage and keep your home comfortable year-round.
4. Eco-friendly: By reducing your energy consumption, a smart thermostat can help you reduce your carbon footprint and lower your impact on the environment. Many smart thermostats also come with energy-saving features like energy usage reports and tips for reducing your energy consumption. By making small changes to your heating and cooling habits, you can help protect the planet and lower your overall energy usage.
5. Remote monitoring: Some smart thermostats offer the ability to monitor your home’s energy usage and HVAC system performance remotely. This can help you identify any issues with your system before they become major problems, potentially saving you money on costly repairs down the line. By staying on top of your system’s performance, you can ensure that your HVAC system is running efficiently and effectively.
Overall, installing a smart thermostat in your home can offer a wide range of benefits, from energy savings and increased comfort to convenience and eco-friendliness. If you’re looking to upgrade your home’s heating and cooling system, a smart thermostat is a smart investment that can help you save money and reduce your environmental impact.
