Tag: setting

  • The Ultimate Guide to Setting Up and Using the LA240P

    The Ultimate Guide to Setting Up and Using the LA240P


    The LA240P is a powerful and versatile piece of equipment that can greatly enhance your audio setup. Whether you are a professional audio engineer or a hobbyist looking to improve your sound quality, the LA240P has everything you need to create a top-notch audio experience.

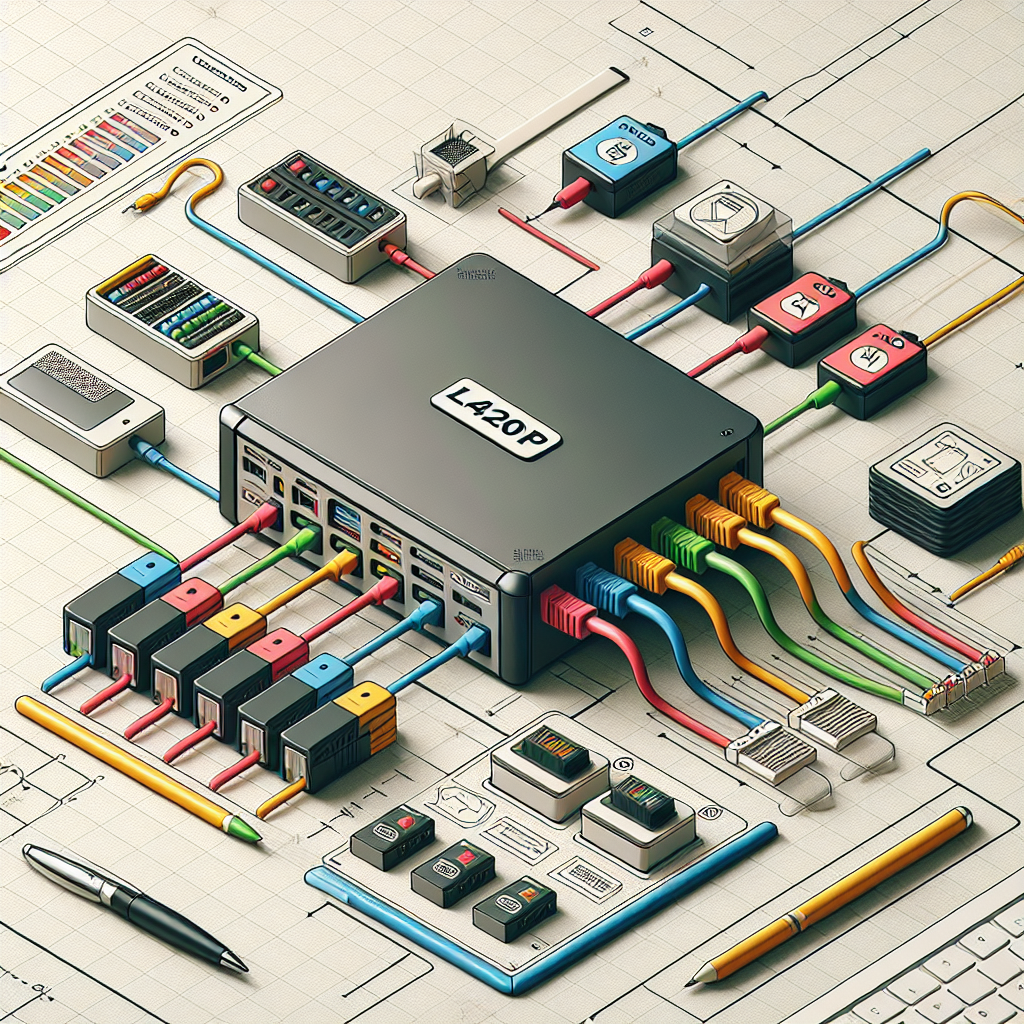
    Setting up the LA240P is quick and easy, making it perfect for both beginners and experienced users. To get started, simply connect the LA240P to your audio source using the included cables. The LA240P features multiple input and output options, allowing you to connect a variety of devices such as microphones, instruments, and audio interfaces.

    Once you have connected the LA240P to your audio source, you can begin adjusting the settings to achieve the perfect sound. The LA240P features a wide range of controls, including volume, tone, and gain adjustments. Experimenting with these controls will allow you to fine-tune your audio to meet your specific needs and preferences.

    One of the standout features of the LA240P is its built-in effects processor. This processor allows you to add various effects to your audio, such as reverb, delay, and chorus. These effects can help enhance the overall quality of your sound and give your audio a professional touch.

    In addition to its effects processor, the LA240P also features a built-in EQ (equalizer) that allows you to adjust the frequency response of your audio. This can help you achieve a more balanced sound and ensure that all elements of your audio are properly represented.

    Using the LA240P is a straightforward process, thanks to its intuitive interface and user-friendly design. Whether you are recording, mixing, or performing live, the LA240P is a reliable and versatile tool that can help you achieve your audio goals.

    In conclusion, the LA240P is a must-have piece of equipment for anyone looking to improve their audio setup. With its easy setup, powerful features, and intuitive controls, the LA240P is sure to take your audio quality to the next level. Whether you are a professional or a hobbyist, the LA240P has everything you need to create a top-notch audio experience.

  • Magic Wand Massager, Delivers Relaxing Massage Through the Tennis Ball Size Head, Two Powerful Speeds 6,000/5,000 Vibrations Per Minute (on High/Low Setting), 12″ Long with 6′ Cord

    Magic Wand Massager, Delivers Relaxing Massage Through the Tennis Ball Size Head, Two Powerful Speeds 6,000/5,000 Vibrations Per Minute (on High/Low Setting), 12″ Long with 6′ Cord


    Price: $50.92
    (as of Dec 02,2024 02:24:51 UTC – Details)


    America’s number one choice for a personal massager for over 30 years. Whether you are looking to soothe an aching shoulder or want a more personal massage experience, the Magic Wand is the proven answer that has earned Americans’ trust and rave reviews for years. Use your Magic Wand(R) by applying its firm massaging, vibrating head onto major muscle groups for up to 25 minutes at a time (refer to the manual). To provide a more stimulating massage, start on the low setting and then progress to the higher setting, if desired. Many women have found the Magic Wand to be a great help in maintaining their intimate health and wellbeing. Since the late 70s, many therapists and advisers have specifically recommended the Magic Wand to their clients as the superior choice, thanks to its deep, powerful and pleasure-filled vibrations. Satisfied women and couples agree! Comes with 1-year warranty.
    Is Discontinued By Manufacturer ‏ : ‎ Yes
    Product Dimensions ‏ : ‎ 14 x 3 x 3 inches; 1.48 Pounds
    Item model number ‏ : ‎ HV-260
    Date First Available ‏ : ‎ January 25, 2006
    Manufacturer ‏ : ‎ HealthTime
    ASIN ‏ : ‎ B003BYRTGU

    Physical therapists choice for over 20 years
    Relieves pressure and loosens tense muscles, increases blood flow, and helps relieve back pain
    Use to massage athletes to prevent injury and speed recovery by easing inflammation
    Personal massager for woman to help maintain intimate health and well-being
    12″ long with a 2.25″ head diameter

    Customers say

    Customers like the power and effectiveness of the massager. They mention it’s very powerful, great for soreness, and helps relieve pain and Restless Legs Syndrome. Some appreciate the enjoyment. However, some customers have reported that the noise level is quite noisy and the size is small. Opinions differ on the build quality, value for money, and attachments.

    AI-generated from the text of customer reviews


    Looking for a powerful and effective way to relieve tension and stress in your muscles? Look no further than the Magic Wand Massager! This incredible massager delivers a relaxing massage through its tennis ball size head, providing targeted relief to your sore muscles.

    With two powerful speeds of 6,000 and 5,000 vibrations per minute on high and low settings, you can customize your massage experience to suit your needs. Whether you’re looking for a deep tissue massage or a gentle, soothing touch, the Magic Wand Massager has you covered.

    Measuring 12 inches long with a 6-foot cord, this massager is easy to maneuver and use on any part of your body. Say goodbye to muscle tension and hello to relaxation with the Magic Wand Massager. Try it out today and feel the difference for yourself! #MagicWandMassager #Relaxation #MuscleRelief
    #Magic #Wand #Massager #Delivers #Relaxing #Massage #Tennis #Ball #Size #Powerful #Speeds #Vibrations #Minute #HighLow #Setting #Long #Cord

  • FACILITIES MANAGER: Journal, Notes, Ideas, Actions, Priorities, Checklists, Log | Tool for Daily Goal Setting Tracker Planner | Time Management | … Journal Office Book Gifts for Meetings

    FACILITIES MANAGER: Journal, Notes, Ideas, Actions, Priorities, Checklists, Log | Tool for Daily Goal Setting Tracker Planner | Time Management | … Journal Office Book Gifts for Meetings


    Price: $9.99
    (as of Dec 01,2024 16:09:31 UTC – Details)


    ASIN ‏ : ‎ B0D9BVBHYJ
    Publisher ‏ : ‎ Independently published (July 10, 2024)
    Language ‏ : ‎ English
    Paperback ‏ : ‎ 123 pages
    Item Weight ‏ : ‎ 13.6 ounces
    Dimensions ‏ : ‎ 8.5 x 0.28 x 11 inches


    Are you a facilities manager looking for a tool to help you stay organized and on top of your daily tasks? Look no further! Our Facilities Manager Journal is the perfect solution for keeping track of notes, ideas, actions, priorities, checklists, and more. This journal is designed to help you set daily goals, track progress, and manage your time effectively.

    Whether you’re planning meetings, coordinating maintenance projects, or managing budgets, this journal will help you stay on track and achieve your goals. With sections for daily reflections, to-do lists, and goal setting, you’ll have everything you need to stay organized and efficient.

    This journal also makes a great gift for any facilities manager in your life. Help them stay organized and on top of their game with this handy tool. Order your Facilities Manager Journal today and take your productivity to the next level!
    #FACILITIES #MANAGER #Journal #Notes #Ideas #Actions #Priorities #Checklists #Log #Tool #Daily #Goal #Setting #Tracker #Planner #Time #Management #Journal #Office #Book #Gifts #Meetings

  • Installing and Setting Up the HOM2200BB: A Step-by-Step Guide

    Installing and Setting Up the HOM2200BB: A Step-by-Step Guide


    The HOM2200BB is a popular circuit breaker panel that is commonly used in residential and commercial buildings. Installing and setting up this circuit breaker panel can be a daunting task for those who are not familiar with electrical work. However, with the right tools and knowledge, it can be done easily and safely.

    Here is a step-by-step guide on how to install and set up the HOM2200BB circuit breaker panel:

    Step 1: Gather the necessary tools and materials

    Before you begin the installation process, make sure you have all the necessary tools and materials on hand. You will need a screwdriver, wire strippers, a voltage tester, and the HOM2200BB circuit breaker panel. Additionally, make sure you have the appropriate size wires for your electrical system.

    Step 2: Turn off the power

    Before you start working on the circuit breaker panel, it is crucial to turn off the power to the building. Locate the main electrical panel and switch off the main breaker. Use a voltage tester to ensure that there is no electricity running through the panel before you begin working.

    Step 3: Mount the circuit breaker panel

    Once the power is turned off, you can begin mounting the HOM2200BB circuit breaker panel on the wall. Make sure to secure the panel in place using the appropriate screws and anchors. Ensure that the panel is level and securely mounted before proceeding to the next step.

    Step 4: Install the circuit breakers

    Next, you will need to install the circuit breakers into the panel. Carefully follow the manufacturer’s instructions on how to properly install the breakers. Make sure that the breakers are securely in place before moving on to the next step.

    Step 5: Connect the wires

    After installing the circuit breakers, it is time to connect the wires to the panel. Make sure to strip the wires to the appropriate length and insert them into the designated slots on the panel. Double-check that the wires are securely connected and tighten the screws to ensure a proper connection.

    Step 6: Test the panel

    Once all the wires are connected, it is important to test the panel to ensure that it is working properly. Turn the power back on and check each circuit breaker to make sure they are functioning correctly. Use a voltage tester to check for any electrical issues before closing the panel.

    In conclusion, installing and setting up the HOM2200BB circuit breaker panel is a straightforward process as long as you follow these step-by-step instructions. Remember to always prioritize safety when working with electricity and consult a professional electrician if you are unsure about any part of the installation process. With the right tools and knowledge, you can successfully install and set up the HOM2200BB circuit breaker panel in no time.

  • Service Level Agreements: Setting the Standard for Service Excellence

    Service Level Agreements: Setting the Standard for Service Excellence


    Service Level Agreements (SLAs) are a crucial component of any business relationship, setting clear expectations for the level of service that will be provided. They serve as a contract between a service provider and their clients, outlining the agreed-upon level of service, response times, and performance metrics.

    Setting the standard for service excellence, SLAs ensure that both parties are on the same page regarding the quality of service that will be delivered. By clearly defining the expected level of service, SLAs help to prevent misunderstandings and disputes between the service provider and the client.

    SLAs typically include several key components, such as the scope of services provided, the expected response times for resolving issues, and the metrics used to measure performance. For example, an SLA for a software company may include details on system uptime, response times for resolving technical issues, and the availability of customer support.

    By establishing clear guidelines for service delivery, SLAs help to hold service providers accountable for meeting the agreed-upon standards. They also provide clients with assurance that they will receive the level of service they expect, helping to build trust and loyalty in the relationship.

    In addition to setting expectations for service delivery, SLAs can also help to identify areas for improvement and drive continuous improvement efforts. By tracking performance metrics outlined in the SLA, service providers can identify trends and patterns that may indicate the need for process improvements or additional resources.

    Overall, Service Level Agreements are a valuable tool for setting the standard for service excellence. By clearly defining expectations and performance metrics, SLAs help to ensure that both parties are aligned on the level of service to be provided, ultimately leading to improved customer satisfaction and loyalty.

  • A Comprehensive Guide to Setting Up and Managing the Hitachi HUS 110

    A Comprehensive Guide to Setting Up and Managing the Hitachi HUS 110


    The Hitachi HUS 110 is a high-performance storage system that offers advanced features for managing data storage in a business environment. Setting up and managing the Hitachi HUS 110 can be a complex process, but with the right guidance, it can be a smooth and efficient experience. In this comprehensive guide, we will walk you through the steps to set up and manage the Hitachi HUS 110 effectively.

    Step 1: Planning and Preparation

    Before setting up the Hitachi HUS 110, it is important to plan and prepare for the installation process. First, you need to determine the storage requirements of your organization, including the amount of data that needs to be stored, the performance levels required, and any specific features that are needed. You should also consider the physical location where the Hitachi HUS 110 will be installed, as well as any connectivity requirements.

    Step 2: Physical Installation

    Once you have planned and prepared for the installation, you can begin setting up the Hitachi HUS 110. Start by unpacking the system and connecting it to power and network cables. Make sure to follow the manufacturer’s instructions for installing the system in a secure and stable location. Once the system is physically installed, you can move on to configuring the software.

    Step 3: Configuring the Software

    Configuring the software on the Hitachi HUS 110 is a critical step in setting up the system. You will need to access the management interface of the system, which can usually be done through a web browser. From the management interface, you can set up the storage pools, create LUNs (Logical Unit Numbers), and configure RAID levels for redundancy and performance.

    Step 4: Managing the Hitachi HUS 110

    Once the Hitachi HUS 110 is set up and configured, it is important to regularly monitor and manage the system to ensure optimal performance and reliability. You can use the management interface to monitor storage usage, performance metrics, and system health. You should also regularly check for firmware updates and apply them as needed to keep the system up to date.

    Overall, setting up and managing the Hitachi HUS 110 requires careful planning, preparation, and attention to detail. By following this comprehensive guide, you can ensure a smooth and efficient installation process, as well as effective management of the storage system in your organization.

  • The Ultimate Guide to Setting Up WiFi on Windows 11 Home (GMA2900A)

    The Ultimate Guide to Setting Up WiFi on Windows 11 Home (GMA2900A)


    If you’ve recently upgraded to Windows 11 Home on your GMA2900A device and are having trouble setting up your WiFi connection, you’re in the right place. In this ultimate guide, we’ll walk you through the steps to get your WiFi up and running smoothly.

    Step 1: Open the Settings Menu

    To begin, click on the Start menu in the bottom left corner of your screen and select the Settings icon (it looks like a gear). This will open the Settings menu where you can access all of your system settings.

    Step 2: Select Network & Internet

    In the Settings menu, click on the Network & Internet option. This will take you to a screen where you can manage all of your network connections, including WiFi.

    Step 3: Turn on WiFi

    In the Network & Internet menu, make sure the WiFi toggle switch is turned on. This will allow your device to detect nearby WiFi networks and connect to them.

    Step 4: Connect to a WiFi Network

    Once WiFi is turned on, your device will automatically search for available networks. Click on the network you want to connect to and enter the password if required. If you don’t see your network listed, click on the “Add a network” option and enter the network name and password manually.

    Step 5: Troubleshooting

    If you’re having trouble connecting to a WiFi network, try restarting your device and router. You can also try forgetting the network and reconnecting to it, or updating your network adapter drivers.

    Step 6: Manage WiFi Settings

    In the Network & Internet menu, you can also access advanced WiFi settings such as network status, VPN, and proxy settings. You can also manage your WiFi network profiles and prioritize network connections.

    By following these steps, you should be able to successfully set up your WiFi connection on your GMA2900A device running Windows 11 Home. If you continue to experience issues, reach out to your device manufacturer or Microsoft support for further assistance.

  • Setting Up a Home Network with Cisco Routers: Tips and Tricks

    Setting Up a Home Network with Cisco Routers: Tips and Tricks


    Setting up a home network can seem like a daunting task, but with the right tools and knowledge, it can be a breeze. One of the most popular choices for home networking is using Cisco routers, which offer robust features and reliable performance. In this article, we will provide some tips and tricks for setting up a home network with Cisco routers.

    First and foremost, it is important to choose the right Cisco router for your needs. Cisco offers a wide range of routers, from entry-level models for basic home networking to high-end models for advanced users. Consider factors such as the size of your home, the number of devices you will be connecting to the network, and the type of internet connection you have when selecting a router.

    Once you have chosen a router, the next step is to set it up. Most Cisco routers come with a setup wizard that will guide you through the process of configuring your network. This typically involves connecting the router to your modem, configuring the wireless network settings, and setting up security features such as a password.

    One important tip for setting up a home network with Cisco routers is to secure your network. By default, most routers come with a default username and password, which can make your network vulnerable to hacking. Be sure to change the default username and password to something secure and unique to protect your network from unauthorized access.

    Another important tip is to regularly update your router’s firmware. Cisco regularly releases firmware updates that fix security vulnerabilities and improve performance. Check for updates regularly and install them to ensure that your network is secure and running smoothly.

    In addition to securing your network, it is also important to optimize your router’s settings for performance. This can include adjusting the wireless channel, enabling Quality of Service (QoS) settings to prioritize certain types of traffic, and setting up guest networks for visitors.

    Finally, consider using additional networking equipment such as switches and access points to extend the range and capabilities of your home network. Cisco offers a range of networking equipment that can help you expand and enhance your network.

    In conclusion, setting up a home network with Cisco routers can be a straightforward process with the right tools and knowledge. By choosing the right router, securing your network, optimizing settings for performance, and considering additional networking equipment, you can create a reliable and efficient home network that meets your needs.

  • Director of Business Continuity: Journal, Notes, Ideas, Actions, Priorities, Checklists, Log | Tool for Daily Goal Setting Tracker Planner | Time … Journal Office Book Gifts for Meetings

    Director of Business Continuity: Journal, Notes, Ideas, Actions, Priorities, Checklists, Log | Tool for Daily Goal Setting Tracker Planner | Time … Journal Office Book Gifts for Meetings


    Price: $11.00
    (as of Nov 30,2024 18:19:44 UTC – Details)


    ASIN ‏ : ‎ B0DJMR38C3
    Publisher ‏ : ‎ Independently published (October 3, 2024)
    Language ‏ : ‎ English
    Paperback ‏ : ‎ 123 pages
    Item Weight ‏ : ‎ 13.6 ounces
    Dimensions ‏ : ‎ 8.5 x 0.28 x 11 inches


    As the Director of Business Continuity, staying organized and on top of tasks is crucial to ensuring the resilience of our organization. That’s why I rely on my Business Continuity Journal to keep track of my thoughts, notes, ideas, actions, priorities, and checklists.

    This journal serves as a tool for daily goal setting, tracking progress, and planning for the future. It helps me stay focused and motivated, especially during meetings where decisions need to be made quickly and effectively.

    With sections dedicated to logging important information, setting goals, and reflecting on past actions, this journal has become an indispensable part of my daily routine. It helps me stay accountable and ensures that I am always working towards the overall success of our business continuity efforts.

    If you’re looking for a practical and thoughtful gift for a colleague or team member, consider gifting them a Business Continuity Journal. It’s a valuable tool for anyone involved in business continuity planning and management, and will surely help them stay organized and focused on achieving their goals.
    #Director #Business #Continuity #Journal #Notes #Ideas #Actions #Priorities #Checklists #Log #Tool #Daily #Goal #Setting #Tracker #Planner #Time #Journal #Office #Book #Gifts #Meetings

  • A Beginner’s Guide to Setting Up Your PS4

    A Beginner’s Guide to Setting Up Your PS4


    If you’re a new owner of a PlayStation 4 (PS4) or are thinking about getting one, setting it up can seem like a daunting task. However, with a few simple steps, you can have your PS4 up and running in no time. In this beginner’s guide, we’ll walk you through the process of setting up your PS4 and getting started with your gaming experience.

    1. Unboxing Your PS4

    The first step in setting up your PS4 is unboxing it. Carefully remove the console, controller, power cable, HDMI cable, and any other accessories from the box. Make sure to keep all of the packaging materials in case you need to return or transport your PS4 in the future.

    2. Connecting Your PS4

    Once you have unboxed your PS4, it’s time to connect it to your TV or monitor. Plug one end of the HDMI cable into the back of the PS4 and the other end into an available HDMI port on your TV or monitor. Next, connect the power cable to the back of the PS4 and plug it into a power outlet.

    3. Setting Up Your PS4

    Turn on your TV or monitor and switch to the HDMI input that your PS4 is connected to. Press the power button on the front of the PS4 to turn it on. Follow the on-screen prompts to set up your language, internet connection, and user profile. If you already have a PlayStation Network account, you can sign in using your existing credentials. If not, you can create a new account during the setup process.

    4. Updating Your PS4

    After setting up your PS4, it’s a good idea to check for any system updates. Go to the Settings menu, select System Software Update, and follow the on-screen instructions to download and install any available updates. This will ensure that your PS4 is running the latest software and has access to all of the latest features and improvements.

    5. Installing Games and Apps

    Once your PS4 is set up and updated, you can start installing games and apps. You can either purchase physical discs or download games from the PlayStation Store. Insert a game disc into the disc drive on the front of the PS4 or navigate to the PlayStation Store to browse and download digital games. You can also download apps like Netflix, Hulu, and YouTube to stream movies, TV shows, and other content on your PS4.

    6. Enjoying Your PS4

    With your PS4 set up and games installed, you’re ready to start gaming. Use the controller to navigate the PS4’s menus, launch games, and control gameplay. You can also customize your gaming experience by adjusting settings like display resolution, sound output, and controller settings.

    Setting up your PS4 may seem overwhelming at first, but with these simple steps, you’ll be up and running in no time. Whether you’re a seasoned gamer or new to the world of gaming, the PS4 offers a wide range of games and entertainment options to enjoy. So grab your controller, dive into the world of gaming, and have fun with your new PS4!

Chat Icon