Tag: setting

  • A Comprehensive Guide to Setting Up and Using Micros Workstation 6

    A Comprehensive Guide to Setting Up and Using Micros Workstation 6


    Micros Workstation 6 is a powerful Point of Sale (POS) system designed for businesses in the hospitality and retail industries. Setting up and using this system may seem daunting at first, but with the right guidance, you can quickly become proficient in its operation. In this comprehensive guide, we will walk you through the process of setting up and using Micros Workstation 6 to help you streamline your business operations.

    Setting Up Micros Workstation 6:

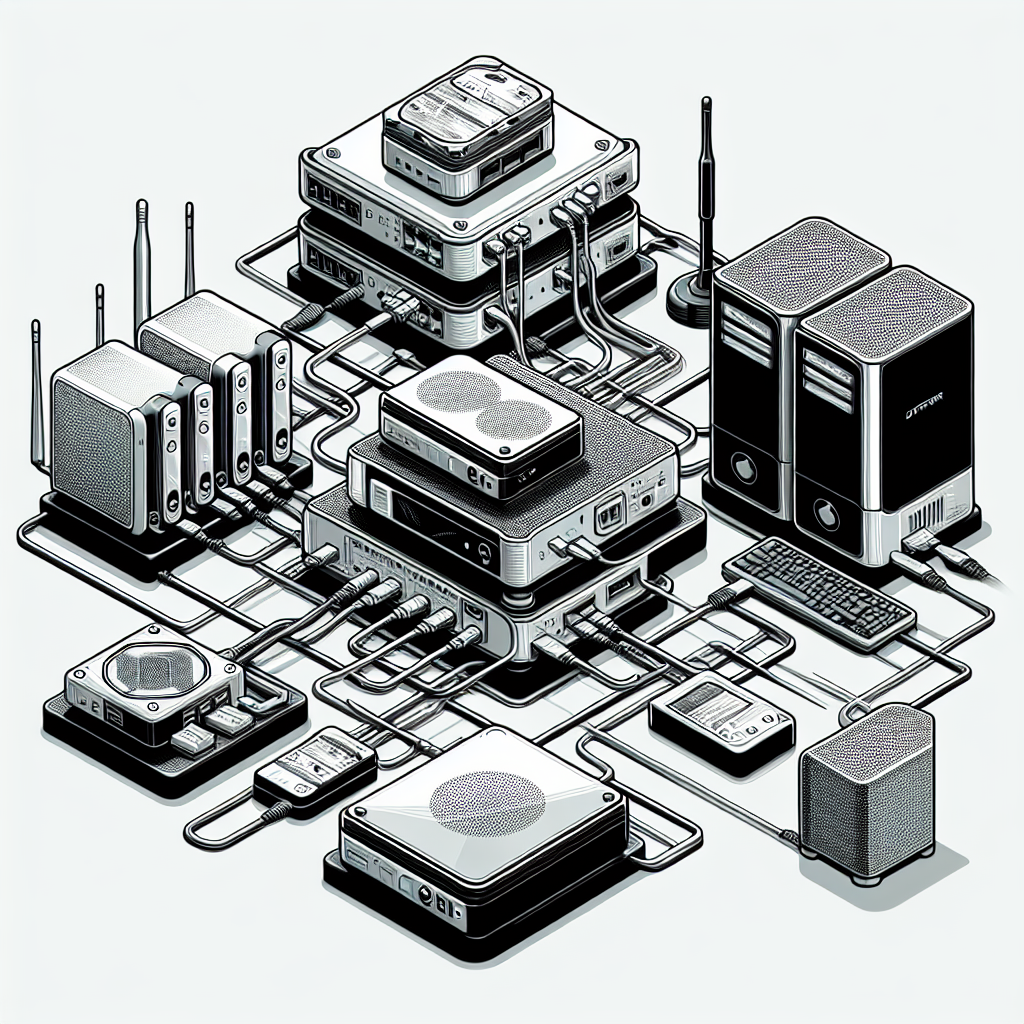
    1. Hardware Installation: The first step in setting up Micros Workstation 6 is to install the necessary hardware components. This includes the POS terminal, receipt printer, cash drawer, and any other peripherals you may need. Make sure to follow the manufacturer’s instructions carefully to ensure proper installation.

    2. Software Installation: Once the hardware is set up, you will need to install the Micros Workstation 6 software. This can typically be done by inserting a CD or downloading the software from the manufacturer’s website. Follow the on-screen instructions to complete the installation process.

    3. Configuration: After installing the software, you will need to configure the system to meet your specific business needs. This includes setting up menu items, pricing, taxes, and employee profiles. Take the time to customize the system to ensure it aligns with your business operations.

    Using Micros Workstation 6:

    1. Logging In: To begin using Micros Workstation 6, you will need to log in with your unique username and password. This will give you access to the system’s features and functionalities.

    2. Taking Orders: With Micros Workstation 6, you can easily take orders from customers using the intuitive interface. Simply select the items they wish to purchase, input any special instructions, and process the payment.

    3. Managing Inventory: One of the key features of Micros Workstation 6 is its ability to track inventory levels in real-time. This can help you avoid stockouts and optimize your ordering process.

    4. Reporting: Micros Workstation 6 offers robust reporting capabilities that allow you to track sales, monitor employee performance, and analyze customer trends. Use these reports to make informed business decisions and improve your operations.

    5. Customer Service: With Micros Workstation 6, you can provide top-notch customer service by quickly processing orders, accepting various forms of payment, and offering loyalty programs. This will help you build a loyal customer base and drive repeat business.

    In conclusion, setting up and using Micros Workstation 6 can greatly benefit your business by streamlining operations, improving efficiency, and enhancing customer service. By following this comprehensive guide, you can quickly become proficient in using this powerful POS system and take your business to the next level.

  • A Complete Guide to Setting Up and Using the MHK2 Thermostat

    A Complete Guide to Setting Up and Using the MHK2 Thermostat


    The MHK2 Thermostat is a popular choice for homeowners looking to control their heating and cooling systems with ease. This advanced thermostat offers a wide range of features and settings that can help you maintain a comfortable indoor environment while also saving energy and money on your utility bills. If you’re considering installing an MHK2 Thermostat in your home, this complete guide will walk you through the setup process and show you how to use all of its features effectively.

    Setting up the MHK2 Thermostat is a straightforward process that can be done in just a few simple steps. Here’s a step-by-step guide to help you get started:

    1. Turn off the power to your heating and cooling system at the circuit breaker before beginning installation.

    2. Remove your old thermostat from the wall and disconnect the wires. Make note of where each wire is connected so you can easily rewire the new thermostat.

    3. Mount the MHK2 Thermostat base to the wall using the included screws and anchors. Make sure the base is level before tightening the screws.

    4. Connect the wires from your heating and cooling system to the corresponding terminals on the MHK2 Thermostat base. Refer to the installation manual for detailed instructions on wiring.

    5. Install the batteries in the thermostat and snap the thermostat onto the base. Turn the power back on at the circuit breaker.

    6. Follow the on-screen prompts to set up the thermostat, including setting the date and time, selecting your preferred temperature settings, and programming a schedule for your heating and cooling system.

    Once your MHK2 Thermostat is set up, you can begin using its various features to control your indoor environment more effectively. Here are some key features of the MHK2 Thermostat and how to use them:

    1. Programmable Schedule: The MHK2 Thermostat allows you to create a customized heating and cooling schedule based on your daily routine. You can set different temperature settings for different times of day, helping you save energy when you’re not home.

    2. Remote Access: With the MHK2 Thermostat, you can control your heating and cooling system from anywhere using your smartphone or tablet. Simply download the app and connect it to your thermostat to make adjustments on the go.

    3. Energy-saving Tips: The MHK2 Thermostat provides energy-saving tips and recommendations based on your usage patterns. By following these tips, you can reduce your energy consumption and lower your utility bills.

    4. Smart Alerts: The MHK2 Thermostat can send you alerts when it detects unusual activity or maintenance issues with your heating and cooling system. This can help you address problems quickly and prevent costly repairs.

    Overall, the MHK2 Thermostat is a versatile and user-friendly device that can help you control your indoor environment more effectively. By following this complete guide to setting up and using the MHK2 Thermostat, you can enjoy a more comfortable and energy-efficient home all year round.

  • Setting Up and Configuring Network Attached Storage (NAS) for Beginners

    Setting Up and Configuring Network Attached Storage (NAS) for Beginners


    Setting Up and Configuring Network Attached Storage (NAS) for Beginners

    Network Attached Storage (NAS) is a convenient and secure way to store and access your files over a network. Whether you are a small business owner, a home user, or a student, setting up a NAS can greatly enhance your data storage capabilities and make file sharing easier. In this article, we will guide you through the process of setting up and configuring a NAS for beginners.

    Choose the right NAS device

    The first step in setting up a NAS is choosing the right device for your needs. There are many different NAS devices available on the market, ranging from simple single-drive units to more complex multi-drive systems. Consider factors such as storage capacity, data redundancy options, network connectivity, and budget when selecting a NAS device.

    Connect the NAS to your network

    Once you have chosen a NAS device, the next step is to connect it to your network. Most NAS devices can be connected to your network using an Ethernet cable. Simply plug one end of the cable into the NAS device and the other end into your router or switch. Make sure to power on the NAS device and follow the manufacturer’s instructions for setting up the network connection.

    Access the NAS web interface

    After connecting the NAS device to your network, you can access the web interface to configure the device settings. Open a web browser on a computer connected to the same network as the NAS and enter the IP address of the NAS in the address bar. You may need to enter a username and password to access the web interface, which is typically provided in the device’s user manual.

    Configure the NAS settings

    Once you have accessed the NAS web interface, you can start configuring the device settings. This may include setting up user accounts, creating shared folders, configuring security settings, and setting up data backups. Some NAS devices also offer additional features such as media streaming, remote access, and cloud backup integration, which you can configure based on your needs.

    Set up file sharing

    One of the main benefits of a NAS is the ability to share files with other users on the network. You can create shared folders on the NAS and assign permissions to specific users or groups to control who can access and modify the files. You can also set up remote access to the NAS to access your files from anywhere with an internet connection.

    Backup your data

    Data backup is a critical aspect of NAS setup, as it protects your files from loss or corruption. Most NAS devices offer built-in backup features that allow you to schedule regular backups of your data to an external drive or cloud storage service. Make sure to set up a backup plan to ensure that your files are safe and secure.

    In conclusion, setting up and configuring a NAS for beginners is a straightforward process that can greatly enhance your data storage and file sharing capabilities. By choosing the right NAS device, connecting it to your network, configuring the settings, setting up file sharing, and backing up your data, you can enjoy the benefits of a secure and convenient storage solution.

  • The Home Network Manual: The Complete Guide to Setting Up, Upgrading, and Securing Your Home Network (Home Technology Manuals)

    The Home Network Manual: The Complete Guide to Setting Up, Upgrading, and Securing Your Home Network (Home Technology Manuals)


    Price: $13.99 – $13.01
    (as of Nov 27,2024 01:23:47 UTC – Details)


    From the Publisher

    The Home Network Manual: This is a complete guide for your home network for all peopleThe Home Network Manual: This is a complete guide for your home network for all people

    Everything you need to know to design and implement a fast, secure, and reliable home network

    Everything you need to know to design and implement a fast, secure, and reliable home network

    Home Network Manual logo laptop graphic

    Home Network Manual logo laptop graphic

    Home Network Manual logo house graphic

    Home Network Manual logo house graphic

    Finally an any-person's guide on setting up a home network with book coverFinally an any-person's guide on setting up a home network with book cover

    This Book Is for You If:

    pull hair frustration laptop

    pull hair frustration laptop

    Digital matrix house with padlock

    Digital matrix house with padlock

    Basic network diagram with Internet, router, laptop, tablet, and phone

    Basic network diagram with Internet, router, laptop, tablet, and phone

    You are having problems with your home network (Wi-Fi, speed, stability)

    You want to make sure your home network is secure

    You are planning to create or upgrade your home network

    Customer Reviews

    4.0 out of 5 stars

    92

    4.3 out of 5 stars

    61

    4.1 out of 5 stars

    86

    Price

    $7.99$7.99 $8.99$8.99 $6.99$6.99

    Contents
    A comprehensive guide for building, improving, and securing your home network. A comprehensive guide to protect yourself from fraud, identity theft, and other cybercrimes. A comprehensive guide for getting started with or taking your smart home to the next level.

    Kindle

    Paperback

    Audiobook

    Publisher ‏ : ‎ Buchanan Holdings, LLC (February 19, 2022)
    Language ‏ : ‎ English
    Paperback ‏ : ‎ 183 pages
    ISBN-10 ‏ : ‎ 1735543063
    ISBN-13 ‏ : ‎ 978-1735543062
    Item Weight ‏ : ‎ 6.6 ounces
    Dimensions ‏ : ‎ 5 x 0.42 x 8 inches


    Are you tired of dealing with slow internet speeds, dropped connections, and security vulnerabilities on your home network? Look no further than “The Home Network Manual: The Complete Guide to Setting Up, Upgrading, and Securing Your Home Network.”

    This comprehensive guide will walk you through everything you need to know to create a fast, reliable, and secure home network. From selecting the right router and setting up your network to optimizing your Wi-Fi signal and protecting your devices from cyber threats, this manual covers it all.

    Whether you’re a tech novice or a seasoned pro, “The Home Network Manual” is the ultimate resource for anyone looking to take control of their home network. Say goodbye to frustrating network issues and hello to a seamless online experience with the help of this essential guide.

    Don’t let a poorly configured network hold you back any longer. Pick up your copy of “The Home Network Manual” today and start enjoying a faster, more secure internet connection in no time.
    #Home #Network #Manual #Complete #Guide #Setting #Upgrading #Securing #Home #Network #Home #Technology #Manuals

  • The Ultimate Guide to Setting Up an Effective Help Desk

    The Ultimate Guide to Setting Up an Effective Help Desk


    Setting up an effective help desk is crucial for any business looking to provide excellent customer service and support. A well-functioning help desk can streamline communication, resolve issues quickly, and ultimately improve customer satisfaction. In this ultimate guide, we will outline the key steps and best practices for setting up an effective help desk.

    1. Define your goals and objectives: Before setting up a help desk, it’s important to clearly define your goals and objectives. What do you hope to achieve with your help desk? Are you looking to improve response times, increase customer satisfaction, or reduce support costs? Clarifying your goals will help you determine the structure and processes needed for your help desk.

    2. Choose the right help desk software: The first step in setting up an effective help desk is selecting the right help desk software. There are many help desk solutions available, each with its own features and capabilities. Look for a software that is user-friendly, customizable, and integrates well with your existing systems. Some popular options include Zendesk, Freshdesk, and Desk.com.

    3. Create a knowledge base: A knowledge base is a central repository of information that can help both customers and support agents find answers to common questions. By creating a knowledge base, you can reduce the number of repetitive inquiries and empower customers to find solutions on their own. Make sure to regularly update and maintain your knowledge base to ensure accuracy.

    4. Establish clear communication channels: Effective communication is key to a successful help desk. Make sure to offer multiple communication channels for customers to reach out, such as phone, email, live chat, and social media. Additionally, set clear expectations for response times and availability to manage customer expectations.

    5. Train your support team: Your support team is the backbone of your help desk, so it’s crucial to invest in their training and development. Provide comprehensive training on the help desk software, customer service best practices, and product knowledge. Encourage ongoing learning and feedback to continuously improve your support team’s performance.

    6. Monitor and analyze performance: Setting up key performance indicators (KPIs) is essential for measuring the effectiveness of your help desk. Track metrics such as response time, resolution time, customer satisfaction, and ticket volume to identify areas for improvement. Regularly review performance data and make adjustments as needed to optimize your help desk operations.

    7. Seek feedback and continuously improve: Finally, don’t forget to seek feedback from both customers and support agents to identify areas for improvement. Use surveys, customer feedback forms, and performance reviews to gather insights and make data-driven decisions. Continuously iterate and improve your help desk processes to provide the best possible support experience for your customers.

    In conclusion, setting up an effective help desk requires careful planning, the right tools, and a commitment to continuous improvement. By following the steps outlined in this ultimate guide, you can create a help desk that enhances customer satisfaction, streamlines support processes, and ultimately drives business success.

  • The Ultimate Guide to Setting Up the Netgear F5800RP Range Extender

    The Ultimate Guide to Setting Up the Netgear F5800RP Range Extender


    If you’re struggling with weak Wi-Fi signals in certain areas of your home, the Netgear F5800RP Range Extender is the perfect solution. This powerful device helps to extend your wireless network coverage and improve connectivity throughout your home. In this ultimate guide, we’ll walk you through the step-by-step process of setting up your Netgear F5800RP Range Extender for optimal performance.

    Step 1: Placement

    The first step in setting up your Netgear F5800RP Range Extender is to find the optimal placement for the device. Ideally, you should place the range extender in a central location between your router and the area where you’re experiencing weak Wi-Fi signals. Make sure to place the range extender in an open area, away from any obstructions that could interfere with the signal.

    Step 2: Connect to the Range Extender

    Next, connect your computer or mobile device to the range extender’s Wi-Fi network. Look for the network name (SSID) and password on the label of the range extender. Once connected, open a web browser and enter http://mywifiext.net in the address bar.

    Step 3: Set Up the Range Extender

    Follow the on-screen instructions to set up the range extender. You’ll be prompted to select your existing Wi-Fi network and enter the password. The range extender will then automatically connect to your router and extend the network coverage.

    Step 4: Configure Settings

    Once the range extender is set up, you can configure additional settings to optimize performance. You can adjust the Wi-Fi settings, set up a guest network, and enable security features to protect your network.

    Step 5: Test the Connection

    After configuring the settings, it’s important to test the connection to ensure that the range extender is working properly. Move to the area where you were experiencing weak Wi-Fi signals and check the signal strength on your device. You should notice a significant improvement in signal strength and connectivity.

    With the Netgear F5800RP Range Extender, you can say goodbye to Wi-Fi dead zones and enjoy seamless connectivity throughout your home. Follow this ultimate guide to set up your range extender and experience improved Wi-Fi performance today.

  • The Ultimate Guide to Setting Up Network Attached Storage (NAS)

    The Ultimate Guide to Setting Up Network Attached Storage (NAS)


    Network Attached Storage (NAS) devices have become increasingly popular in recent years as a convenient and efficient way to store and access data. Whether you are a home user looking to centralize your multimedia files or a business looking to create a shared storage solution, setting up a NAS can greatly simplify your data management tasks. In this ultimate guide, we will walk you through the steps to set up your own NAS device.

    Step 1: Choose the Right NAS Device

    The first step in setting up a NAS is choosing the right device for your needs. There are many different NAS devices available on the market, ranging from simple single-drive devices to more complex multi-drive systems. Consider factors such as storage capacity, number of drive bays, processor speed, and connectivity options when selecting a NAS device.

    Step 2: Install the Drives

    Once you have chosen a NAS device, it’s time to install the drives. Depending on the device, you may need to purchase and install your own hard drives or SSDs. Make sure to follow the manufacturer’s instructions for installing the drives, including any necessary formatting or partitioning steps.

    Step 3: Connect the NAS to Your Network

    Next, you will need to connect your NAS device to your network. Most NAS devices come with Ethernet ports for connecting to your router or switch. Simply plug in the Ethernet cable and power on the device.

    Step 4: Configure the NAS

    After connecting the NAS to your network, you will need to configure the device. This typically involves accessing the NAS’s web-based interface through a web browser. From there, you can set up user accounts, shared folders, and access permissions. You may also need to configure network settings such as IP address and DNS settings.

    Step 5: Set Up Remote Access

    One of the key benefits of a NAS is the ability to access your files remotely. To enable remote access, you will need to configure port forwarding on your router and set up a dynamic DNS service. This will allow you to access your NAS from anywhere with an internet connection.

    Step 6: Install Applications and Services

    Many NAS devices come with built-in applications and services that can enhance the functionality of your device. These may include media servers, backup solutions, and file synchronization tools. Take some time to explore the available options and install the applications that best suit your needs.

    Step 7: Backup Your Data

    Finally, don’t forget to set up a backup solution for your NAS. This could involve using a cloud storage service, an external hard drive, or another NAS device. Regularly backing up your data is essential to protect against data loss.

    Setting up a NAS device may seem daunting at first, but with the right guidance, it can be a straightforward process. By following the steps outlined in this guide, you can create a secure and efficient storage solution for all your data management needs.

  • The Ultimate Guide to Setting Up an Efficient Help Desk

    The Ultimate Guide to Setting Up an Efficient Help Desk


    Setting up an efficient help desk is crucial for any business looking to provide excellent customer support. A help desk serves as the first point of contact for customers seeking assistance with products or services, and it is essential to ensure that it is well-organized and efficient in order to provide timely and effective support. In this ultimate guide, we will outline the steps to setting up a successful help desk that will enhance customer satisfaction and improve overall business operations.

    1. Define your help desk goals and objectives: Before setting up a help desk, it is important to clearly define your goals and objectives. Determine what you want to achieve with your help desk, such as improving response times, increasing customer satisfaction, or reducing ticket resolution times. Having a clear understanding of your goals will help guide your decisions when setting up and managing your help desk.

    2. Choose the right help desk software: The foundation of an efficient help desk is the right software. There are many help desk software options available, each with its own features and capabilities. Consider factors such as ease of use, scalability, integration with other tools, and cost when choosing a help desk software that best fits your business needs.

    3. Set up a ticketing system: A ticketing system is essential for organizing and tracking customer inquiries. When a customer reaches out for help, a ticket is created that contains all relevant information about the issue and its status. This system helps ensure that no customer request falls through the cracks and allows for efficient tracking and resolution of issues.

    4. Create a knowledge base: A knowledge base is a repository of information that contains answers to frequently asked questions and common issues. By providing customers with access to a knowledge base, you can reduce the number of support requests and empower customers to find solutions on their own. Make sure to regularly update and maintain your knowledge base to ensure it remains relevant and effective.

    5. Implement self-service options: In addition to a knowledge base, consider implementing self-service options such as chatbots or automated responses. These tools can help customers find answers to their questions quickly and easily, without having to wait for a support agent. Self-service options can also help reduce the workload on your help desk team and improve overall efficiency.

    6. Train your help desk team: A well-trained help desk team is essential for providing top-notch customer support. Make sure to provide comprehensive training on your help desk software, company policies, and customer service best practices. Encourage ongoing professional development and provide regular feedback to help your team continuously improve their skills and performance.

    7. Monitor and analyze help desk performance: Regularly monitor key performance metrics such as response times, ticket resolution times, customer satisfaction scores, and ticket volume. Use this data to identify areas for improvement and make necessary adjustments to optimize your help desk operations. Consider implementing a performance dashboard to track and visualize key metrics in real-time.

    By following these steps and implementing best practices, you can set up an efficient help desk that will enhance customer satisfaction, improve operational efficiency, and ultimately drive business success. Remember that providing excellent customer support is a key differentiator for businesses in today’s competitive market, and investing in a well-organized and efficient help desk is essential for meeting and exceeding customer expectations.

  • A Comprehensive Guide to Setting Up Amazon FSx for NetApp ONTAP

    A Comprehensive Guide to Setting Up Amazon FSx for NetApp ONTAP


    Amazon FSx for NetApp ONTAP is a fully managed file storage service that makes it easy to set up and deploy NetApp ONTAP file systems in the cloud. With this service, you can easily migrate your existing file systems to the cloud and take advantage of the scalability and flexibility that AWS has to offer.

    In this comprehensive guide, we will walk you through the steps to set up Amazon FSx for NetApp ONTAP and get your file systems up and running in no time.

    Step 1: Create a new FSx for NetApp ONTAP file system

    The first step in setting up Amazon FSx for NetApp ONTAP is to create a new file system. To do this, simply log in to the AWS Management Console and navigate to the FSx service. Click on the “Create file system” button and select the NetApp ONTAP option. From there, you can configure your file system settings, such as storage capacity, performance, and data protection options.

    Step 2: Configure networking and security settings

    Next, you will need to configure the networking and security settings for your file system. You can choose to create a new VPC or use an existing one, as well as specify security groups and subnets. This will ensure that your file system is securely accessible from your existing AWS resources.

    Step 3: Set up data replication and backup options

    One of the key features of Amazon FSx for NetApp ONTAP is its built-in data replication and backup capabilities. You can choose to enable synchronous or asynchronous data replication between multiple file systems, as well as set up automated backups to ensure your data is protected and easily recoverable.

    Step 4: Access and manage your file system

    Once your file system is set up, you can easily access and manage it through the AWS Management Console or command line interface. You can create and delete files, set permissions, and monitor performance metrics to ensure your file system is running smoothly.

    In conclusion, setting up Amazon FSx for NetApp ONTAP is a straightforward process that can help you easily migrate and manage your file systems in the cloud. By following this comprehensive guide, you can quickly get your file systems up and running and take advantage of the scalability and flexibility that AWS has to offer.

  • A Comprehensive Guide to Setting Up Cisco Wireless Networks

    A Comprehensive Guide to Setting Up Cisco Wireless Networks


    Setting up a Cisco wireless network can seem like a daunting task, but with the right guidance and resources, it can be a straightforward process. In this comprehensive guide, we will walk you through the steps necessary to set up a Cisco wireless network from start to finish.

    Step 1: Planning and Preparation

    Before you begin setting up your Cisco wireless network, it is important to have a clear plan in place. This includes determining the size and scope of your network, as well as identifying any potential obstacles or interference that may affect signal strength.

    You will also need to gather the necessary equipment, including Cisco wireless access points, routers, and switches. Make sure to carefully read the installation instructions for each piece of equipment to ensure a smooth setup process.

    Step 2: Configuring Your Cisco Wireless Access Points

    The next step in setting up your Cisco wireless network is to configure your wireless access points. This can be done through the Cisco Wireless Control System (WCS) or the Cisco Prime Infrastructure software.

    When configuring your access points, make sure to set up a secure network name (SSID) and password to prevent unauthorized access. You may also want to configure additional security features, such as WPA2 encryption, to protect your network from potential threats.

    Step 3: Setting Up Your Cisco Wireless Router

    Once your access points are configured, the next step is to set up your Cisco wireless router. This involves connecting the router to your modem and configuring the network settings, such as IP addresses and DHCP settings.

    Make sure to enable the wireless network on your router and configure the SSID and password to match those of your access points. You may also want to set up additional security features, such as firewall settings and port forwarding, to enhance the security of your network.

    Step 4: Testing and Troubleshooting

    After setting up your Cisco wireless network, it is important to test the network to ensure that all devices are able to connect and access the internet. You may want to use a laptop or mobile device to test the signal strength and connectivity in different areas of your home or office.

    If you encounter any issues during the setup process, such as poor signal strength or connectivity issues, refer to the troubleshooting guides provided by Cisco or consult with a network technician for assistance.

    By following these steps and guidelines, you can successfully set up a Cisco wireless network in your home or office. With the right planning and preparation, you can enjoy a fast, reliable, and secure wireless network that meets your connectivity needs.

Chat Icon