Your cart is currently empty!
Tag: Tutorial
Step-by-Step Tutorial: Programming Real Robots in C++ with Raspberry Pi
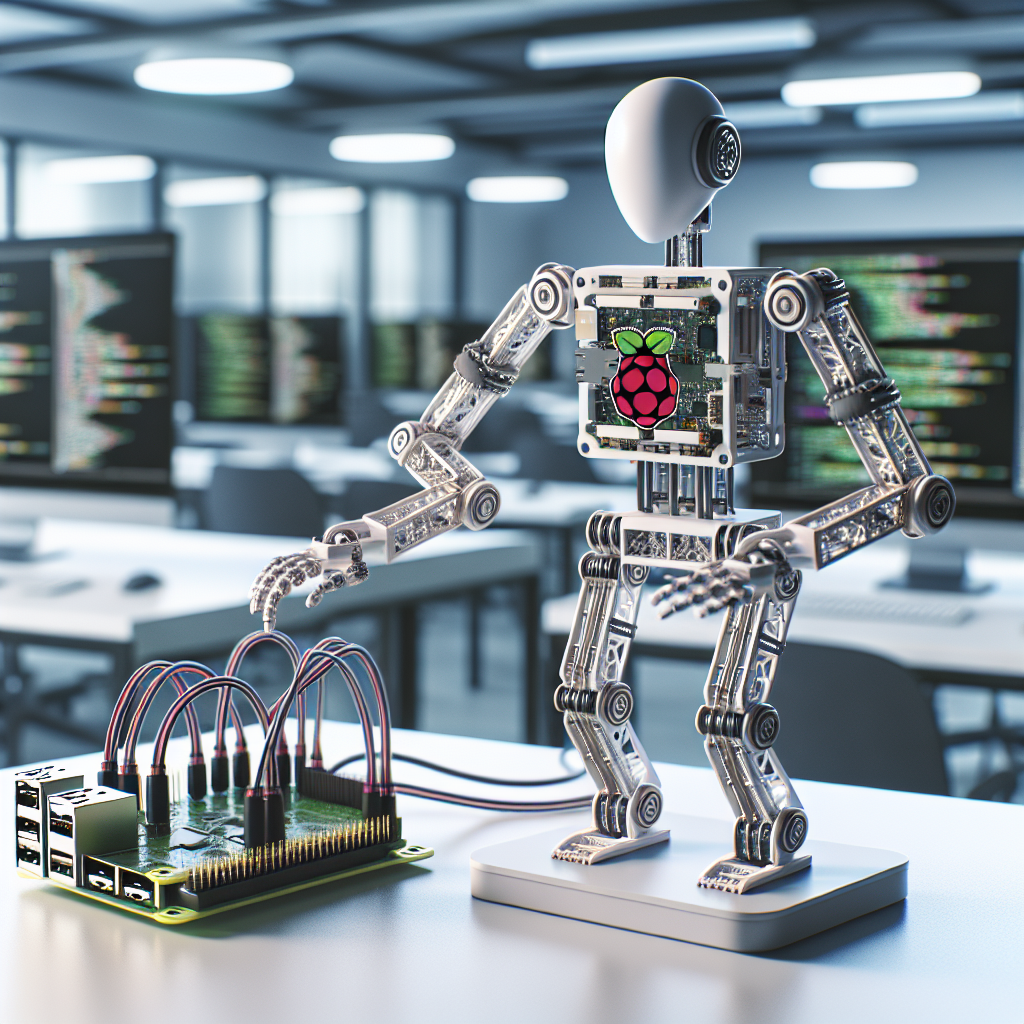
Programming real robots with C++ and Raspberry Pi can be an exciting and rewarding experience. With the right tools and knowledge, you can create sophisticated and intelligent robots that can perform a variety of tasks.In this step-by-step tutorial, we will guide you through the process of programming real robots using C++ and Raspberry Pi. By the end of this tutorial, you will have a basic understanding of how to control robots using C++ code running on a Raspberry Pi.
Step 1: Set up your Raspberry Pi
The first step in programming real robots with C++ and Raspberry Pi is to set up your Raspberry Pi. Make sure that your Raspberry Pi is connected to the internet and that you have installed the necessary software, such as the C++ compiler and any libraries you may need for your robot project.
Step 2: Connect your Raspberry Pi to your robot
Next, you will need to connect your Raspberry Pi to your robot. Depending on the type of robot you are using, you may need to connect the Raspberry Pi to a motor controller, sensors, or other components. Make sure that all connections are secure and that your Raspberry Pi is properly powered.
Step 3: Write your C++ code
Now it’s time to start writing your C++ code. You can use a text editor on your Raspberry Pi to write your code, or you can use a more advanced Integrated Development Environment (IDE) such as Visual Studio Code. In your code, you can control the movements of your robot, read sensor data, and perform any other tasks that you want your robot to do.
Step 4: Compile and run your code
Once you have written your C++ code, you will need to compile it before running it on your Raspberry Pi. To compile your code, open a terminal window on your Raspberry Pi and use the C++ compiler to compile your code. If there are any errors in your code, the compiler will let you know so that you can fix them.
Step 5: Test your robot
After you have compiled your code, it’s time to test your robot. Run your code on your Raspberry Pi and observe how your robot responds to your commands. You may need to make some adjustments to your code to ensure that your robot behaves as expected.
Programming real robots with C++ and Raspberry Pi can be a challenging but rewarding experience. By following this step-by-step tutorial, you can learn how to control robots using C++ code running on a Raspberry Pi. With practice and experimentation, you can create incredible robots that can perform a wide range of tasks.
#StepbyStep #Tutorial #Programming #Real #Robots #Raspberry,practical robotics in c++: build and program real autonomous robots using
raspberry piMastering Deep Learning: A Step-by-Step Tutorial on Building Neural Networks with PyTorch and TensorFlow
Deep learning has emerged as a powerful tool in the field of artificial intelligence, allowing machines to learn from data and make decisions without human intervention. In recent years, deep learning frameworks like PyTorch and TensorFlow have revolutionized the way machine learning models are built and deployed.If you’re looking to master deep learning and build powerful neural networks, this step-by-step tutorial will guide you through the process of using PyTorch and TensorFlow to create advanced machine learning models.
Step 1: Understanding Neural Networks
Before diving into building neural networks, it’s important to understand the basic concepts behind them. Neural networks are a set of algorithms modeled after the human brain, designed to recognize patterns and make decisions based on data. They consist of layers of interconnected nodes, or neurons, that process input data and pass it through activation functions to produce an output.
Step 2: Installing PyTorch and TensorFlow
To build neural networks in PyTorch and TensorFlow, you’ll need to install the frameworks on your machine. Both PyTorch and TensorFlow offer easy-to-use APIs and extensive documentation to help you get started. You can install PyTorch and TensorFlow using pip, the Python package manager, or through Anaconda, a popular Python distribution.
Step 3: Building a Simple Neural Network
Once you have PyTorch and TensorFlow installed, you can start building your first neural network. Begin by creating a simple neural network with a few layers and neurons. Use the frameworks’ built-in modules to define the structure of your neural network, including the input and output layers, activation functions, and loss functions.
Step 4: Training Your Neural Network
After defining the structure of your neural network, it’s time to train the model on a dataset. Split your data into training and validation sets, and use gradient descent algorithms like stochastic gradient descent or Adam to optimize the model’s parameters. Monitor the training process using metrics like loss and accuracy to evaluate the model’s performance.
Step 5: Evaluating and Fine-Tuning Your Model
Once your neural network is trained, evaluate its performance on a test dataset to assess its accuracy and generalization capabilities. Fine-tune the model by adjusting hyperparameters like learning rate, batch size, and number of epochs to improve its performance. Experiment with different architectures and optimization techniques to optimize the model for your specific use case.
By following this step-by-step tutorial, you can master deep learning and build advanced neural networks with PyTorch and TensorFlow. With the right knowledge and practice, you can unlock the full potential of deep learning and create cutting-edge machine learning models for a wide range of applications.
#Mastering #Deep #Learning #StepbyStep #Tutorial #Building #Neural #Networks #PyTorch #TensorFlow,understanding deep learning: building machine learning systems with pytorch
and tensorflow: from neural networks (cnnAdventures in Rule-Based Programming: A CLIPS Tutorial
Price: $4.99
(as of Dec 28,2024 03:07:57 UTC – Details)
In this tutorial, we will explore the world of rule-based programming using the CLIPS (C Language Integrated Production System) language. Rule-based programming is a powerful paradigm for solving complex problems by encoding rules and logic in a declarative manner.We will start by introducing the basics of CLIPS and how to install and set up the environment. We will then dive into creating rules and facts, and show how to use them to build a simple expert system.
Next, we will explore advanced features of CLIPS such as pattern matching, conflict resolution strategies, and working with complex data structures. We will also cover debugging techniques and best practices for developing rule-based systems.
Throughout the tutorial, we will provide code examples and practical exercises to help you gain hands-on experience with CLIPS. By the end of this tutorial, you will have a solid understanding of rule-based programming and be able to apply it to a variety of problem domains.
Join us on this exciting adventure into the world of rule-based programming with CLIPS! Let’s get started!
#Adventures #RuleBased #Programming #CLIPS #TutorialELEGOO Mega R3 Project The Most Complete Ultimate Starter Kit with Tutorial Compatible with Arduino IDE
Price:$65.99– $52.79
(as of Dec 28,2024 02:44:12 UTC – Details)From the brand
ELEGOO STEM kits provide all the necessary components, sensors, wires, and boards for you to get started with programming, learning electronics, and creating IoT projects.
We strive our best to make STEM education easy to learn and accessible to the young generation.
Starter Kits
DIY Robotic Car Kits
Controller Boards
PHECDA Laser Engraver & Cutter
How did we get our start?
Chris, the founder of ELEGOO, found out that most enterprises in the STEM industry focused on the hardware of open-source electronics and did not have tools to create a complete product by combining electronic hardware and structural shells.
What makes our products unique?
We have excellent R&D team, constantly upgrading and improving products, and after-sales service team for quick support.
What problem are we solving?
100% compatible with Arduino, ELEGOO’s kits are best-practice for beginners who have no appropriate technical tools to learn about electronics.
Is Discontinued By Manufacturer : No
Product Dimensions : 13.7 x 8.4 x 1.85 inches; 2.15 Pounds
Item model number : EL-KIT-008
Batteries : 1 Lithium Ion batteries required. (included)
Date First Available : April 28, 2016
Manufacturer : ELEGOO
ASIN : B01EWNUUUA
Country of Origin : ChinaThe MEGA2560 complete starter kit with more than 200pcs components, premium quality for Arduino kit
PDF tutorial in the CD (more than 35 lessons)
LCD1602 module and GY-521 sensor module with pin header ( no need to solder by yourself)
Nice package with clear listing and surprise including a nice small box to keep the widget such as LED , IC , buttons , diodes ,etc
We have always cared about the customer experience and improve the product function detailsCustomers say
Customers appreciate the quality, ease of use, and value for money of the single board computer kit. They find the parts selection decent and the instructions clear. The kit is a great learning tool for new circuits and basic electronics building. Many customers find it fun to learn with and say it’s a good value for the money.
AI-generated from the text of customer reviews
Looking to kickstart your Arduino projects? Look no further than the ELEGOO Mega R3 Project, the most complete ultimate starter kit with tutorial compatible with Arduino IDE.This comprehensive kit includes everything you need to get started with your Arduino projects, including the ELEGOO Mega 2560 R3 board, sensors, motors, LCD display, and more. With over 200 components and 35 different projects to work on, the possibilities are endless.
The kit also comes with a detailed tutorial that covers everything from setting up your board to coding your projects. Whether you’re a beginner or an experienced Arduino enthusiast, this kit has something for everyone.
Get your hands on the ELEGOO Mega R3 Project starter kit and start creating amazing projects today. Let your imagination run wild and bring your ideas to life with this ultimate Arduino starter kit.
#ELEGOO #Mega #Project #Complete #Ultimate #Starter #Kit #Tutorial #Compatible #Arduino #IDECisco CyberOps Associate CBROPS 200-201 Cert. Exam Video Training Tutorial 5+ Hr
Cisco CyberOps Associate CBROPS 200-201 Cert. Exam Video Training Tutorial 5+ Hr
Price : 5.99
Ends on : N/A
View on eBay
Are you preparing for the Cisco CyberOps Associate CBROPS 200-201 certification exam? Look no further! Our comprehensive video training tutorial covers all the essential topics you need to know to pass the exam with flying colors.With over 5 hours of in-depth, hands-on instruction, you’ll learn everything from network security concepts to monitoring and analyzing security data. Our expert instructors will guide you through each topic, providing real-world examples and practical tips to help you succeed.
Don’t waste any more time searching for study materials. Get access to our Cisco CyberOps Associate CBROPS 200-201 Cert. Exam Video Training Tutorial today and take your cybersecurity skills to the next level. Start your journey towards becoming a certified cybersecurity professional now!
#Cisco #CyberOps #Associate #CBROPS #Cert #Exam #Video #Training #Tutorial, Cisco SoftwareAdvanced Perl Programming: The Worlds Most Highly Developed Perl Tutorial by Co,
Advanced Perl Programming: The Worlds Most Highly Developed Perl Tutorial by Co,
Price : 9.99
Ends on : N/A
View on eBay
Advanced Perl Programming: The World’s Most Highly Developed Perl Tutorial by CoAre you looking to take your Perl programming skills to the next level? Look no further than our advanced Perl programming tutorial by Co. With years of experience in Perl development, Co has created a comprehensive tutorial that covers everything from advanced data structures to object-oriented programming in Perl.
In this tutorial, you will learn how to leverage Perl’s powerful features to write efficient and scalable code. Co will guide you through topics such as regular expressions, debugging techniques, and best practices for writing maintainable Perl code.
Whether you are a seasoned Perl programmer looking to expand your skills or a beginner eager to dive into the world of advanced Perl programming, this tutorial is perfect for you. Don’t miss out on this opportunity to learn from one of the best Perl developers in the industry.
Stay ahead of the curve and master advanced Perl programming with Co’s tutorial today!
#Advanced #Perl #Programming #Worlds #Highly #Developed #Perl #TutorialNatural Language Processing: A Quick Introduction to NLP with Python and NLTK (Step-by-Step Tutorial for Beginners)
Price: $18.51
(as of Dec 27,2024 01:57:17 UTC – Details)Natural Language Processing: A Quick Introduction to NLP with Python and NLTK (Step-by-Step Tutorial for Beginners)
Are you interested in learning about Natural Language Processing (NLP) and how to implement it using Python and the Natural Language Toolkit (NLTK)? Look no further! In this step-by-step tutorial, we will cover the basics of NLP, how to set up your environment, and how to perform common NLP tasks using Python and NLTK.
What is Natural Language Processing (NLP)?
Natural Language Processing (NLP) is a branch of artificial intelligence that focuses on the interaction between computers and humans using natural language. NLP enables computers to understand, interpret, and generate human language in a way that is both useful and meaningful.Setting Up Your Environment
Before we dive into NLP with Python and NLTK, you will need to set up your environment. Make sure you have Python installed on your machine, and then install NLTK by running the following command in your terminal or command prompt:pip install nltk<br /> ```<br /> <br /> You will also need to download the NLTK data by running the following command:<br /> <br /> ```<br /> import nltk<br /> nltk.download()<br /> ```<br /> <br /> Performing Common NLP Tasks with NLTK<br /> Now that your environment is set up, let's dive into performing common NLP tasks using NLTK. In this tutorial, we will cover the following tasks:<br /> <br /> 1. Tokenization: Breaking down a text into individual words or phrases.<br /> 2. Part-of-Speech Tagging: Assigning a grammatical category to each word in a text.<br /> 3. Named Entity Recognition: Identifying named entities such as names, organizations, and locations in a text.<br /> 4. Sentiment Analysis: Determining the sentiment (positive, negative, neutral) of a text.<br /> <br /> Stay tuned for the next post in this series, where we will cover each of these tasks in detail with code examples using Python and NLTK. Get ready to take your first steps into the exciting world of Natural Language Processing!
#Natural #Language #Processing #Quick #Introduction #NLP #Python #NLTK #StepbyStep #Tutorial #Beginners
Machine Learning with Python Tutorial
Price:$55.99– $44.10
(as of Dec 27,2024 00:32:48 UTC – Details)
Machine Learning with Python TutorialAre you interested in learning about machine learning and how to implement it using Python? Look no further! In this tutorial, we will cover the basics of machine learning and walk you through the process of building and training a machine learning model using Python.
We will start by discussing what machine learning is and why it is important. Then, we will introduce the popular Python libraries such as scikit-learn and TensorFlow that are commonly used for machine learning tasks.
Next, we will dive into the steps involved in building a machine learning model, including data preprocessing, model selection, training, and evaluation. We will also cover important concepts such as feature engineering, model evaluation metrics, and hyperparameter tuning.
Throughout the tutorial, we will provide hands-on examples and code snippets to help you understand the concepts better. By the end of this tutorial, you will have a solid understanding of machine learning fundamentals and be able to build and train your own machine learning models using Python.
So, if you are ready to dive into the exciting world of machine learning with Python, let’s get started!
#Machine #Learning #Python #TutorialData Mining: A Tutorial Based Primer W/ CD-ROM, Roiger Geatz Paperback Textbook
Data Mining: A Tutorial Based Primer W/ CD-ROM, Roiger Geatz Paperback Textbook
Price : 9.99
Ends on : N/A
View on eBay
In this post, we will be discussing the textbook “Data Mining: A Tutorial Based Primer W/ CD-ROM” by Roiger Geatz. This paperback textbook serves as an essential guide for anyone interested in learning about the fundamentals of data mining.The book covers a wide range of topics related to data mining, including data preprocessing, data visualization, classification, clustering, association rule mining, and more. Each chapter is structured in a tutorial format, making it easy for readers to follow along and understand the concepts being presented.
One of the standout features of this textbook is the accompanying CD-ROM, which contains additional resources such as datasets, software tools, and case studies. This hands-on approach allows readers to apply the concepts they have learned in a real-world setting, enhancing their understanding of data mining techniques.
Whether you are a student, researcher, or professional looking to expand your knowledge in data mining, this textbook is a valuable resource that will help you master the fundamentals of this rapidly growing field. Pick up your copy today and start exploring the exciting world of data mining!
#Data #Mining #Tutorial #Based #Primer #CDROM #Roiger #Geatz #Paperback #TextbookELEGOO UNO Project Super Starter Kit with Tutorial and UNO R3 Board Compatible with Arduino IDE
Price: $44.99
(as of Dec 26,2024 18:09:00 UTC – Details)
PDF tutorial(more than 22 lessons) and clear listing in a nice package
The most economical kit based on Arduino platform to starting learning electronics for those beginners who are interested.
Lcd1602 module with pin header (not need to be soldered by yourself)
This is the upgraded starter kits with power supply module, 9V battery with dc
High quality kit with UNO board, compatible with Arduino UNO R3, UNO R4, MEGA 2560 R3, NANO.Customers say
Customers find the single board computer kit functional and easy to use. It comes with a good tutorial to help them learn about Arduino. They find it a great starter kit that provides all the essential components needed to get started. The kit is well-received for its value for money and variety of projects. However, some customers have issues with the instructions being unclear.
AI-generated from the text of customer reviews
Are you looking to dive into the world of electronics and programming? Look no further than the ELEGOO UNO Project Super Starter Kit! This comprehensive kit includes everything you need to start your own Arduino projects, including an UNO R3 board compatible with the Arduino IDE.The kit comes with a detailed tutorial that walks you through 24 different projects, teaching you the basics of electronics and programming along the way. Whether you’re a beginner or an experienced maker, you’ll find something to challenge and inspire you in this kit.
With components like LEDs, resistors, sensors, and more, the possibilities are endless. Whether you want to build a simple LED circuit or a complex robot, this kit has you covered.
So what are you waiting for? Get your hands on the ELEGOO UNO Project Super Starter Kit and start creating today!
#ELEGOO #UNO #Project #Super #Starter #Kit #Tutorial #UNO #Board #Compatible #Arduino #IDE