Tag Archives: ucsc-mlom-c40q-03

Unleash Your Gaming Potential with the CyberPowerPC Gamer Master Gaming PC


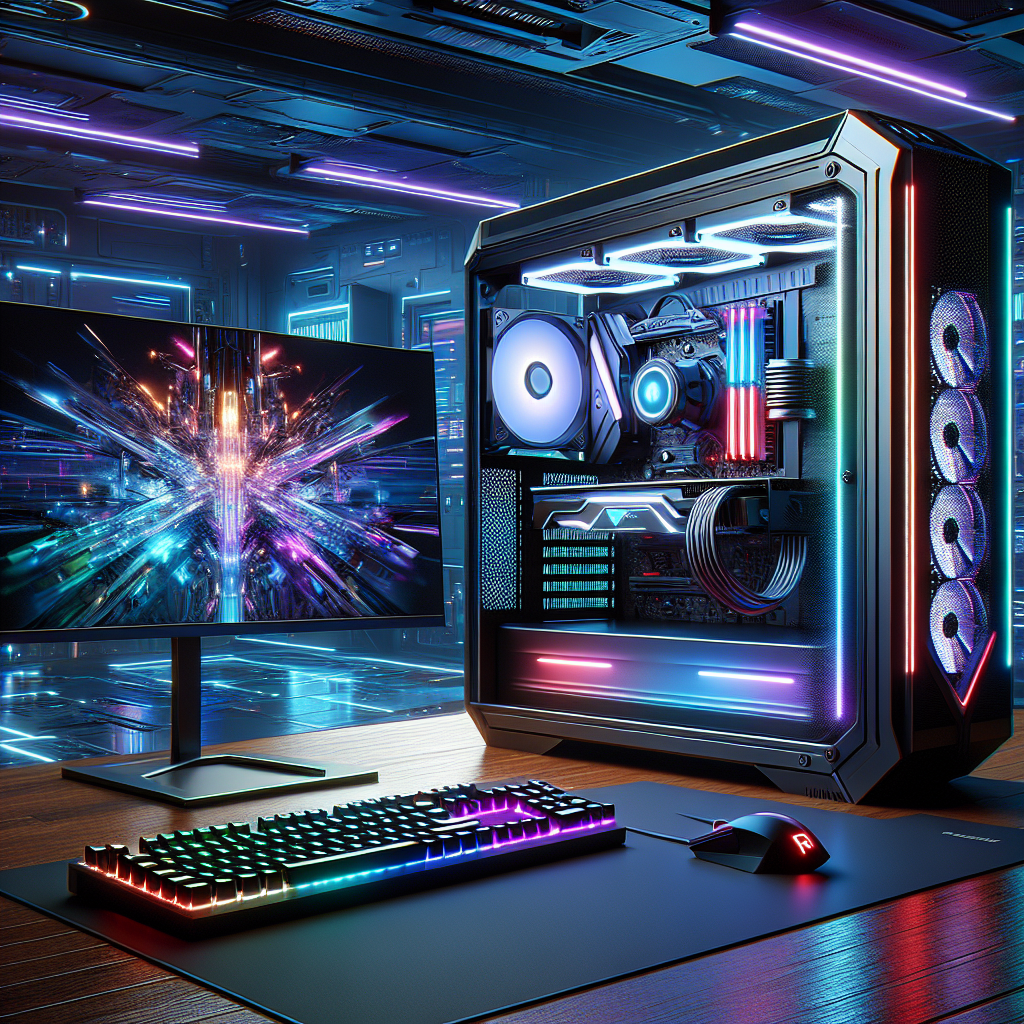
If you’re a passionate gamer looking to take your gaming experience to the next level, then look no further than the CyberPowerPC Gamer Master Gaming PC. This powerful gaming rig is designed to unleash your gaming potential and provide you with the ultimate gaming experience.

The CyberPowerPC Gamer Master Gaming PC is equipped with top-of-the-line hardware that will allow you to play the latest and most demanding games with ease. Powered by an AMD Ryzen processor and NVIDIA GeForce graphics card, this gaming PC can handle even the most graphics-intensive games without breaking a sweat. With fast processing speeds and high-quality graphics, you’ll be able to enjoy smooth and immersive gameplay like never before.

In addition to its powerful hardware, the CyberPowerPC Gamer Master Gaming PC also comes with plenty of storage space and memory to store all your games, files, and media. You won’t have to worry about running out of space or experiencing lag during gameplay, as this gaming PC is designed to handle all your storage and memory needs.

But the benefits of the CyberPowerPC Gamer Master Gaming PC don’t end there. This gaming rig also comes equipped with customizable RGB lighting, allowing you to personalize your gaming setup and create a unique gaming environment that reflects your style and personality. With the ability to change the lighting colors and effects, you can create a gaming setup that is truly your own.

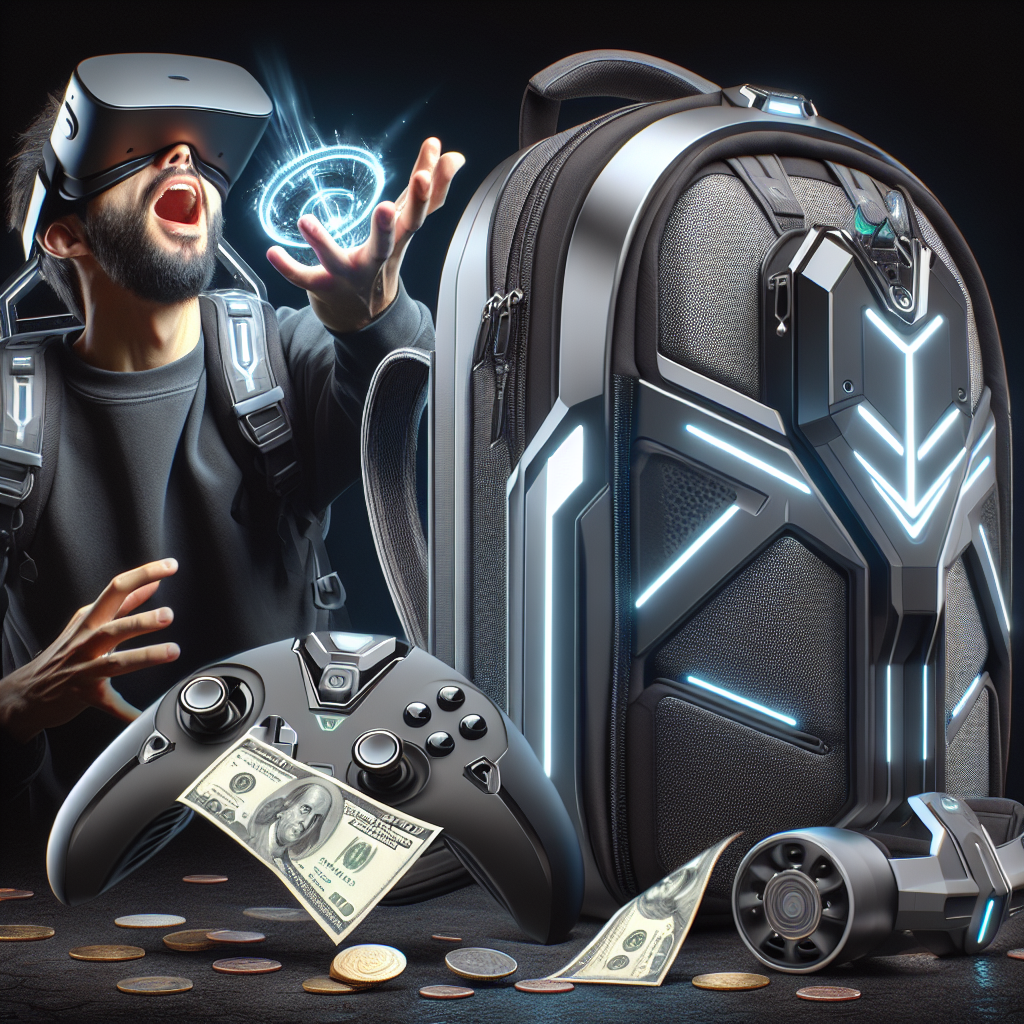
Furthermore, the CyberPowerPC Gamer Master Gaming PC is VR-ready, meaning you can easily connect a virtual reality headset and immerse yourself in a whole new world of gaming. With VR capabilities, you’ll be able to experience games in a whole new way, with stunning visuals and immersive gameplay that will take your gaming experience to new heights.

Overall, the CyberPowerPC Gamer Master Gaming PC is a top-of-the-line gaming rig that is designed to unleash your gaming potential and provide you with the ultimate gaming experience. With powerful hardware, plenty of storage and memory, customizable RGB lighting, and VR capabilities, this gaming PC has everything you need to take your gaming to the next level. So why wait? Unleash your gaming potential today with the CyberPowerPC Gamer Master Gaming PC.

Everything You Need to Know About the Peak Atlas DCA55: A Comprehensive Guide


Are you in the market for a reliable and accurate device to test and measure the characteristics of your semiconductors? Look no further than the Peak Atlas DCA55. This compact and portable device is a must-have tool for electronics hobbyists, engineers, and technicians alike. In this comprehensive guide, we will cover everything you need to know about the Peak Atlas DCA55, from its features and functions to how to use it effectively.

The Peak Atlas DCA55 is a semiconductor analyzer that allows you to quickly and easily test a wide range of semiconductor components, including transistors, diodes, and FETs. With its built-in microcontroller, the DCA55 can automatically identify the type of component being tested and provide detailed information about its characteristics, such as gain, leakage current, and breakdown voltage.

One of the key features of the Peak Atlas DCA55 is its user-friendly interface, which includes a large LCD screen that displays all relevant information about the component being tested. The device also features a rotary dial and push-button controls, making it easy to navigate through the various functions and settings.

In addition to its testing capabilities, the Peak Atlas DCA55 also has a number of advanced features that set it apart from other semiconductor analyzers on the market. For example, the device is able to perform curve tracing, allowing you to plot the characteristics of a component on a graph for further analysis. The DCA55 also has a built-in rechargeable battery, making it ideal for on-the-go testing.

Using the Peak Atlas DCA55 is simple and straightforward. To test a component, simply connect it to the device using the included test leads and press the start button. The DCA55 will then automatically identify the type of component and display its characteristics on the screen. You can also use the device to measure the gain and threshold voltage of transistors, as well as the forward voltage drop of diodes.

Overall, the Peak Atlas DCA55 is a versatile and reliable tool for testing and measuring semiconductor components. Whether you are a hobbyist looking to troubleshoot your latest electronics project or a professional engineer in need of a portable and accurate semiconductor analyzer, the DCA55 has you covered. With its advanced features, user-friendly interface, and compact design, the Peak Atlas DCA55 is sure to become an essential tool in your electronics toolkit.

Exploring the Features and Benefits of the Expi9301ctblk: A Comprehensive Review


The Expi9301ctblk is a cutting-edge device that offers a wide range of features and benefits for users looking to enhance their computing experience. In this comprehensive review, we will explore the key features of the Expi9301ctblk and discuss how it can benefit users in their daily computing tasks.

One of the standout features of the Expi9301ctblk is its high-speed connectivity options. The device comes equipped with advanced networking capabilities, including a Gigabit Ethernet port that allows for lightning-fast data transfer speeds. This means that users can enjoy seamless streaming, gaming, and browsing experiences without any lag or interruptions.

In addition to its impressive networking capabilities, the Expi9301ctblk also boasts a sleek and modern design. The device features a compact and lightweight build that makes it easy to transport and set up in any workspace. Its durable construction ensures that it can withstand the rigors of daily use, making it a reliable and long-lasting investment for users.

Another key benefit of the Expi9301ctblk is its compatibility with a wide range of devices. The device is compatible with both Windows and Mac operating systems, making it a versatile option for users with different preferences. Additionally, the Expi9301ctblk is plug-and-play ready, meaning that users can simply plug it in and start using it without the need for any additional software installations.

One of the standout features of the Expi9301ctblk is its energy-efficient design. The device is designed to consume minimal power, making it an eco-friendly option for users looking to reduce their energy consumption. This not only helps to lower electricity bills but also minimizes the device’s impact on the environment.

Overall, the Expi9301ctblk is a versatile and high-performance device that offers a wide range of features and benefits for users. From its high-speed connectivity options to its sleek design and energy-efficient operation, the Expi9301ctblk is a top choice for users looking to enhance their computing experience. Whether you are a gamer, a streamer, or a professional looking for a reliable networking solution, the Expi9301ctblk has you covered.

Exploring the Features of Micros Workstation 6: A Comprehensive Review


Micros Workstation 6 is a state-of-the-art point-of-sale system that is widely used in the hospitality industry. It combines cutting-edge technology with user-friendly features to provide a seamless and efficient experience for both employees and customers. In this article, we will explore the key features of the Micros Workstation 6 and provide a comprehensive review of this powerful POS system.

One of the standout features of the Micros Workstation 6 is its sleek and modern design. The system features a large, vibrant touchscreen display that is easy to navigate and use. The interface is intuitive and user-friendly, making it simple for employees to quickly learn how to operate the system. This is especially important in a fast-paced environment such as a restaurant or hotel, where time is of the essence.

In addition to its user-friendly design, the Micros Workstation 6 also offers a wide range of features that cater to the specific needs of the hospitality industry. The system is capable of processing a variety of payment types, including credit cards, gift cards, and mobile payments. It also has the ability to split checks, apply discounts, and track customer loyalty programs.

Another key feature of the Micros Workstation 6 is its robust reporting capabilities. The system can generate detailed reports on sales, inventory, employee performance, and more. This data can help managers make informed decisions about their business and identify areas for improvement. The system also offers real-time analytics, allowing managers to monitor sales and performance in real-time.

One of the most impressive features of the Micros Workstation 6 is its integration capabilities. The system can be seamlessly integrated with other software and hardware, such as inventory management systems, kitchen display systems, and online ordering platforms. This integration allows businesses to streamline their operations and provide a seamless experience for both employees and customers.

Overall, the Micros Workstation 6 is a top-of-the-line POS system that offers a wide range of features and capabilities for businesses in the hospitality industry. Its user-friendly design, robust reporting capabilities, and seamless integration make it a valuable tool for businesses looking to improve their operations and provide a superior customer experience. If you are in the market for a new POS system, the Micros Workstation 6 is definitely worth considering.

How to Find Your 3ds Max Serial Number: A Step-by-Step Guide


If you are a user of 3ds Max, you may find yourself in a situation where you need to locate your serial number. Whether you are reinstalling the software, upgrading to a new version, or seeking support from Autodesk, having your serial number on hand is essential. In this article, we will guide you through the steps to find your 3ds Max serial number.

Step 1: Open 3ds Max

The first step in finding your 3ds Max serial number is to open the software on your computer. Simply double-click on the 3ds Max icon or search for it in your programs menu to launch the application.

Step 2: Access the Help Menu

Once you have opened 3ds Max, navigate to the top menu bar and click on “Help.” A drop-down menu will appear with various options.

Step 3: Select About 3ds Max

In the Help menu, locate and click on the option that says “About 3ds Max.” This will open a window that contains information about the software, including your serial number.

Step 4: Locate Your Serial Number

In the About 3ds Max window, you will find your serial number listed under the License Information section. The serial number is typically a combination of numbers and letters and may be divided into groups for easier readability.

Step 5: Note Down Your Serial Number

Once you have located your 3ds Max serial number, it is important to write it down or save it in a secure location. This will ensure that you have easy access to it whenever you need it, such as when reinstalling the software or contacting Autodesk for support.

In conclusion, finding your 3ds Max serial number is a straightforward process that can be done within the software itself. By following the steps outlined in this guide, you can quickly and easily locate your serial number and keep it handy for future reference. Having your serial number on hand will help you stay organized and ensure smooth operations with your 3ds Max software.

Everything You Need to Know About Upgrading Your Lenovo T440p to Windows 11


Lenovo T440p is a popular laptop model known for its durability and performance. If you own a Lenovo T440p and are considering upgrading to Windows 11, there are a few things you need to know to ensure a smooth transition.

First and foremost, it is important to check if your Lenovo T440p meets the minimum system requirements for Windows 11. Microsoft has set specific hardware requirements for Windows 11, including a compatible 64-bit processor, at least 4GB of RAM, and 64GB of storage. Additionally, your device must have a DirectX 12 compatible graphics card and a TPM 2.0 security chip.

If your Lenovo T440p meets these requirements, you can proceed with the upgrade process. Before upgrading, it is recommended to back up your important files and documents to avoid any data loss during the installation process. You can use an external hard drive or cloud storage service to back up your files.

Next, you will need to download the Windows 11 installation files from the Microsoft website. You can either upgrade directly from Windows 10 or perform a clean installation of Windows 11. If you choose to upgrade directly, you can use the Windows Update feature in your settings to download and install the update. However, if you prefer a clean installation, you will need to create a bootable USB drive with the Windows 11 installation files.

Once you have downloaded the installation files, you can begin the upgrade process. Follow the on-screen instructions to complete the installation, and make sure to select the option to keep your personal files and apps if you are upgrading directly from Windows 10.

After the installation is complete, you may need to install updated drivers and software for your Lenovo T440p to ensure compatibility with Windows 11. You can check the Lenovo website for driver updates or use the Device Manager in Windows 11 to update your drivers.

Overall, upgrading your Lenovo T440p to Windows 11 can improve performance and security features on your device. With proper preparation and attention to system requirements, you can enjoy the benefits of the latest Windows operating system on your Lenovo T440p.

A Comprehensive Guide to Adobe Acrobat X Standard: Features and Benefits


Adobe Acrobat X Standard is a powerful tool that allows users to create, edit, and share PDF documents with ease. In this comprehensive guide, we will explore the key features and benefits of Adobe Acrobat X Standard to help you understand how it can streamline your document management process.

Key Features of Adobe Acrobat X Standard:

1. Create PDFs: With Adobe Acrobat X Standard, users can easily convert any file type into a PDF document. Whether you are working with Word documents, Excel spreadsheets, or PowerPoint presentations, Adobe Acrobat X Standard makes it simple to create high-quality PDFs.

2. Edit PDFs: Adobe Acrobat X Standard also offers a range of editing tools that allow users to make changes to PDF documents. From adding text and images to redacting sensitive information, Adobe Acrobat X Standard makes it easy to modify PDF files to suit your needs.

3. Merge and Split PDFs: Adobe Acrobat X Standard allows users to merge multiple PDF documents into a single file or split a large PDF into smaller, more manageable files. This feature is particularly useful for combining related documents or breaking down lengthy reports into separate sections.

4. Fill and Sign Forms: Adobe Acrobat X Standard includes a feature that enables users to fill out and sign PDF forms electronically. This eliminates the need to print out forms, fill them in by hand, and scan them back into a digital format, saving time and reducing paper waste.

5. Secure Documents: Adobe Acrobat X Standard offers robust security features that allow users to protect their PDF documents from unauthorized access. Users can encrypt files with passwords, restrict printing and copying, and add digital signatures to ensure the integrity of their documents.

Benefits of Adobe Acrobat X Standard:

1. Increased Productivity: Adobe Acrobat X Standard streamlines the document management process, allowing users to create, edit, and share PDFs quickly and efficiently. This can help to boost productivity and save time on repetitive tasks.

2. Improved Collaboration: Adobe Acrobat X Standard makes it easy to collaborate with colleagues by sharing PDF documents for review and feedback. With features like commenting and mark-up tools, users can communicate effectively and make revisions in real-time.

3. Enhanced Security: Adobe Acrobat X Standard provides robust security features that help to protect sensitive information and ensure the confidentiality of your documents. This can give users peace of mind knowing that their files are secure from unauthorized access.

4. Cost Savings: By eliminating the need for paper-based processes and reducing the reliance on printing and scanning, Adobe Acrobat X Standard can help to save money on printing costs and reduce paper waste. This can lead to long-term cost savings for businesses and individuals.

In conclusion, Adobe Acrobat X Standard is a versatile tool that offers a wide range of features and benefits for users looking to streamline their document management process. Whether you are creating PDFs, editing documents, or collaborating with colleagues, Adobe Acrobat X Standard provides the tools you need to work efficiently and securely. Consider incorporating Adobe Acrobat X Standard into your workflow to experience the benefits firsthand.

A Comprehensive Guide to the Intel i5-8365U Processor


The Intel i5-8365U processor is a powerful and efficient CPU that is designed for use in laptops and other mobile devices. In this comprehensive guide, we will take a closer look at the features and benefits of this processor, as well as how it compares to other processors on the market.

First and foremost, the Intel i5-8365U is part of the 8th generation of Intel Core processors, which means it offers improved performance and efficiency compared to previous generations. It is a quad-core processor with a base clock speed of 1.6 GHz and a turbo boost speed of up to 4.1 GHz. This means that it can handle demanding tasks such as video editing and gaming with ease.

One of the key features of the i5-8365U processor is its integrated Intel UHD Graphics 620, which provides excellent graphics performance for tasks such as photo and video editing, as well as casual gaming. This integrated graphics solution also helps to save power and extend battery life, making it ideal for use in laptops and other portable devices.

In terms of connectivity, the i5-8365U processor supports a range of modern technologies, including USB 3.1, Thunderbolt 3, and Wi-Fi 6. This means that you can connect to a wide range of devices and peripherals with ease, and enjoy fast and reliable wireless internet connectivity.

When it comes to performance, the i5-8365U processor delivers excellent results in benchmark tests, outperforming many other processors in its class. This makes it a great choice for users who need a powerful and reliable CPU for their everyday computing tasks.

Overall, the Intel i5-8365U processor is a solid choice for anyone in need of a powerful and efficient CPU for their laptop or mobile device. With its impressive performance, integrated graphics, and range of connectivity options, it offers everything you need to get the job done. Whether you’re a casual user or a power user, the i5-8365U has you covered.

The Ultimate Guide to Setting Up the Netgear F5800RP Range Extender


If you’re struggling with weak Wi-Fi signals in certain areas of your home, the Netgear F5800RP Range Extender is the perfect solution. This powerful device helps to extend your wireless network coverage and improve connectivity throughout your home. In this ultimate guide, we’ll walk you through the step-by-step process of setting up your Netgear F5800RP Range Extender for optimal performance.

Step 1: Placement

The first step in setting up your Netgear F5800RP Range Extender is to find the optimal placement for the device. Ideally, you should place the range extender in a central location between your router and the area where you’re experiencing weak Wi-Fi signals. Make sure to place the range extender in an open area, away from any obstructions that could interfere with the signal.

Step 2: Connect to the Range Extender

Next, connect your computer or mobile device to the range extender’s Wi-Fi network. Look for the network name (SSID) and password on the label of the range extender. Once connected, open a web browser and enter http://mywifiext.net in the address bar.

Step 3: Set Up the Range Extender

Follow the on-screen instructions to set up the range extender. You’ll be prompted to select your existing Wi-Fi network and enter the password. The range extender will then automatically connect to your router and extend the network coverage.

Step 4: Configure Settings

Once the range extender is set up, you can configure additional settings to optimize performance. You can adjust the Wi-Fi settings, set up a guest network, and enable security features to protect your network.

Step 5: Test the Connection

After configuring the settings, it’s important to test the connection to ensure that the range extender is working properly. Move to the area where you were experiencing weak Wi-Fi signals and check the signal strength on your device. You should notice a significant improvement in signal strength and connectivity.

With the Netgear F5800RP Range Extender, you can say goodbye to Wi-Fi dead zones and enjoy seamless connectivity throughout your home. Follow this ultimate guide to set up your range extender and experience improved Wi-Fi performance today.

HP VR Backpack G2 Price: Affordable Option for Immersive Gaming


Virtual reality gaming has taken the world by storm, offering players a truly immersive and interactive experience like never before. However, to fully enjoy this cutting-edge technology, you need the right equipment – and that’s where the HP VR Backpack G2 comes in.

The HP VR Backpack G2 is a powerful and versatile VR backpack that allows gamers to experience virtual reality without being tethered to a bulky desktop computer. With its compact and lightweight design, this backpack allows for natural and unrestricted movement, providing a truly immersive gaming experience.

One of the standout features of the HP VR Backpack G2 is its affordability. Priced at a fraction of the cost of some other high-end VR systems, the HP VR Backpack G2 offers excellent value for money without compromising on performance. This makes it a great option for gamers who want to experience virtual reality without breaking the bank.

In terms of specifications, the HP VR Backpack G2 is no slouch. It features a powerful Intel Core i7 processor, NVIDIA GeForce GTX 1070 graphics card, and up to 32GB of RAM, ensuring smooth and lag-free gameplay. The backpack also comes with a high-resolution display and built-in audio, delivering stunning visuals and immersive sound quality.

Another key advantage of the HP VR Backpack G2 is its versatility. In addition to gaming, this backpack can also be used for a wide range of applications, from virtual reality training simulations to immersive entertainment experiences. This makes it a great investment for professionals and enthusiasts alike.

Overall, the HP VR Backpack G2 is a fantastic option for anyone looking to experience virtual reality in a convenient and affordable way. With its powerful performance, lightweight design, and versatile applications, this backpack offers a truly immersive gaming experience without breaking the bank. So why wait? Get your hands on the HP VR Backpack G2 and take your gaming to the next level.